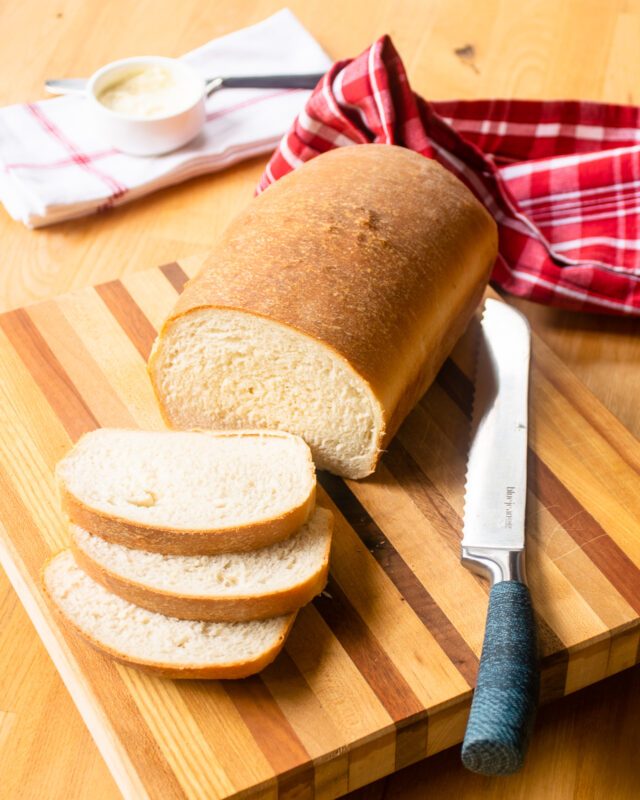
Easy White Bread
Nothing beats the smell and taste of freshly baked homemade bread, especially when it comes to the classic white sandwich bread. Making your own bread may seem daunting, but it’s actually a simple and rewarding process and anyone can do. Not only is making homemade bread is easier than you might think, and it’s a great way to impress your family and friends AND the best way ever to make your house smell fantastic.
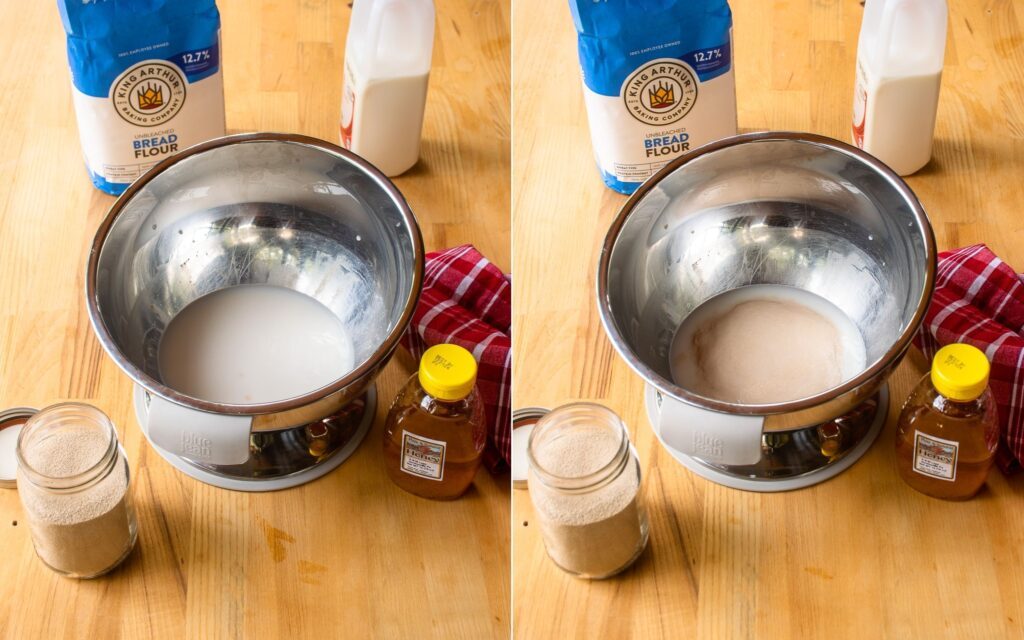
Proofing Yeast
One of the best pieces of advice when making homemade bread of any kind is proofing the yeast. This means activating the yeast by combining it with warm water and sugar, which helps the yeast to grow and create carbon dioxide, which makes the bread rise. It can be frustrating to wait around for the yeast to proof, but it does save time in the long run because it “proves” that your yeast is alive and active. To proof the yeast, mix it with warm liquid and sugar and let it sit for several minutes until it becomes frothy and bubbly. If the yeast doesn’t become frothy, it may be old or inactive, and you’ll need to start over with new yeast. That’s better than having to throw out the whole dough after putting in the kneading time. You can use active or instant dry yeast for this recipe.
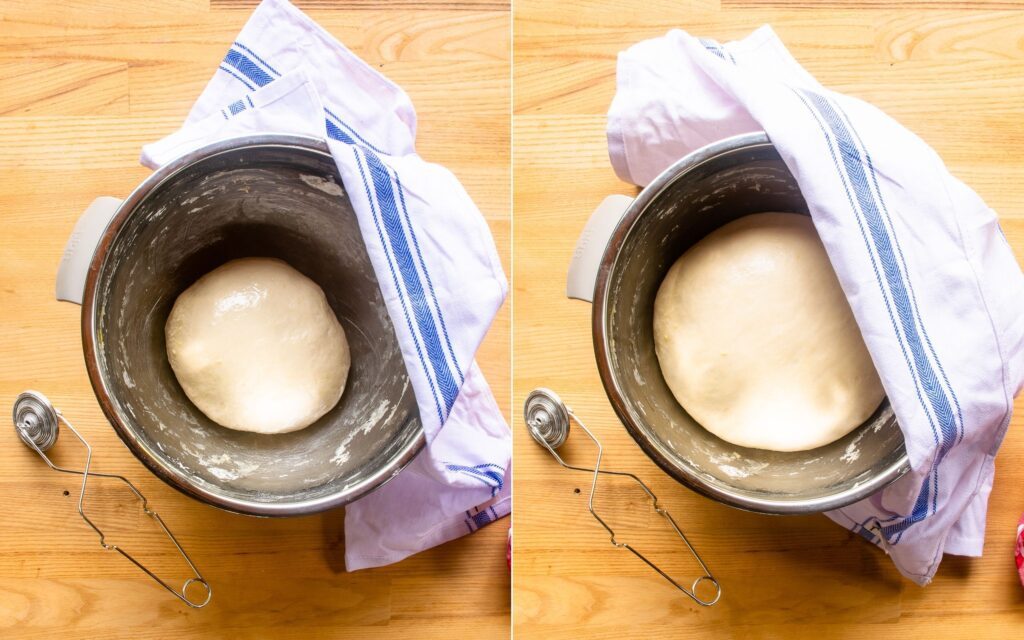
The First Rise
After proofing the yeast, you’ll need to let the dough rise. This first rise allows the yeast to grow and create air pockets, which make the bread light and fluffy. To let the dough rise, cover it with a damp towel or plastic wrap and place it in a warm, draft-free area. Let it rise for about an hour or two (depending on the temperature of its environment), or until it has doubled in size. You can even leave the bread in the refrigerator for its first rise, which will allow it to develop more flavor slowly and helps you manage your time.
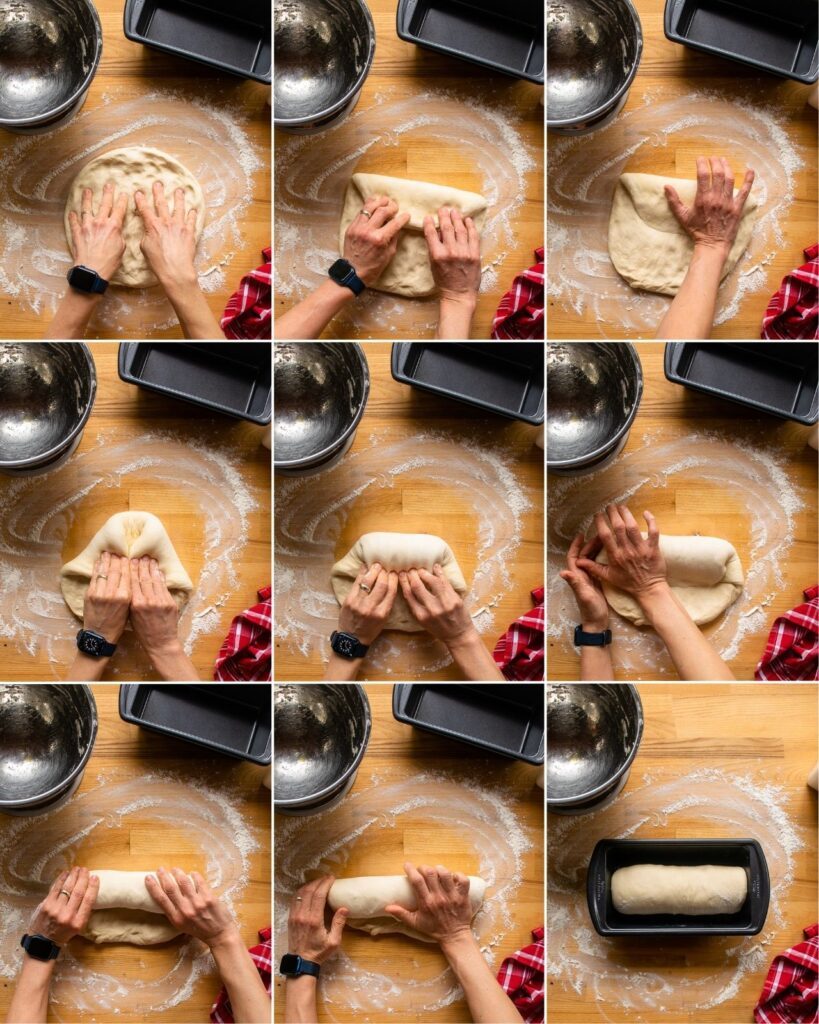
Folding Dough into a Loaf
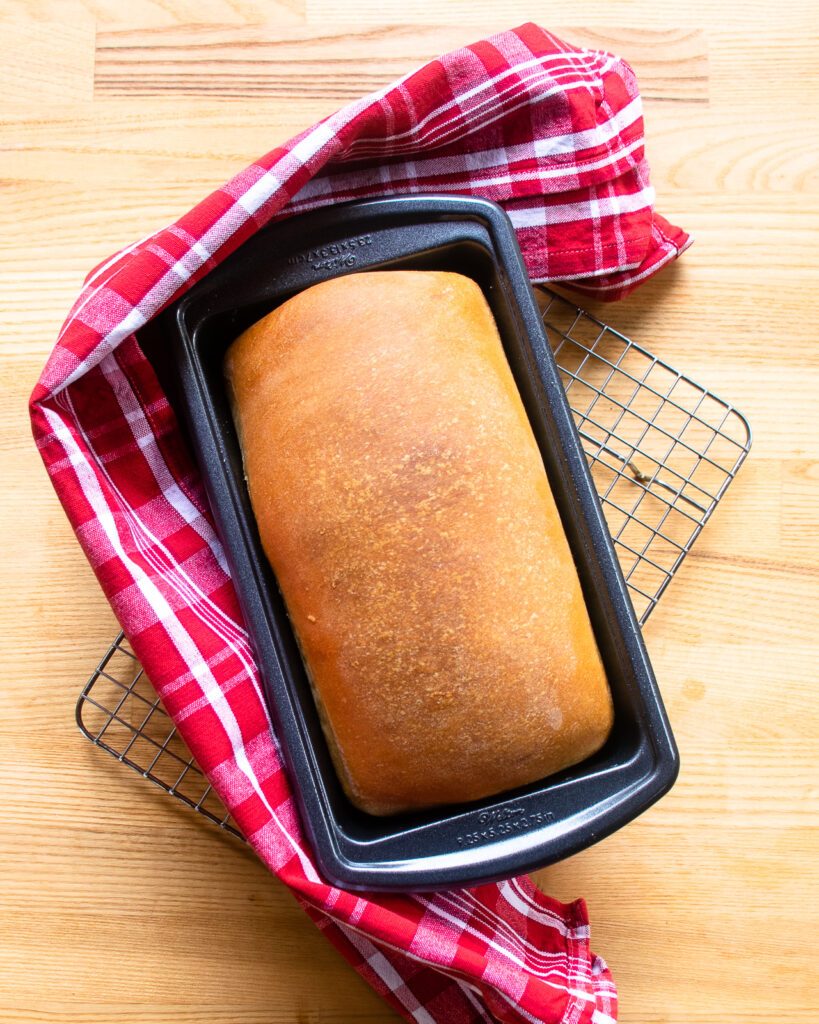
Once the dough has risen, it’s time to shape it into a loaf. Flatten the dough into a rectangle, then fold it according to the recipe, illustrated in the images above. The second rise of the dough will take place in the loaf pan. Just cover the pan with a damp towel and let the dough rise again for about an hour, or until it has risen to the rim of the pan. While the dough is rising, pre-heat your oven to 375˚F.
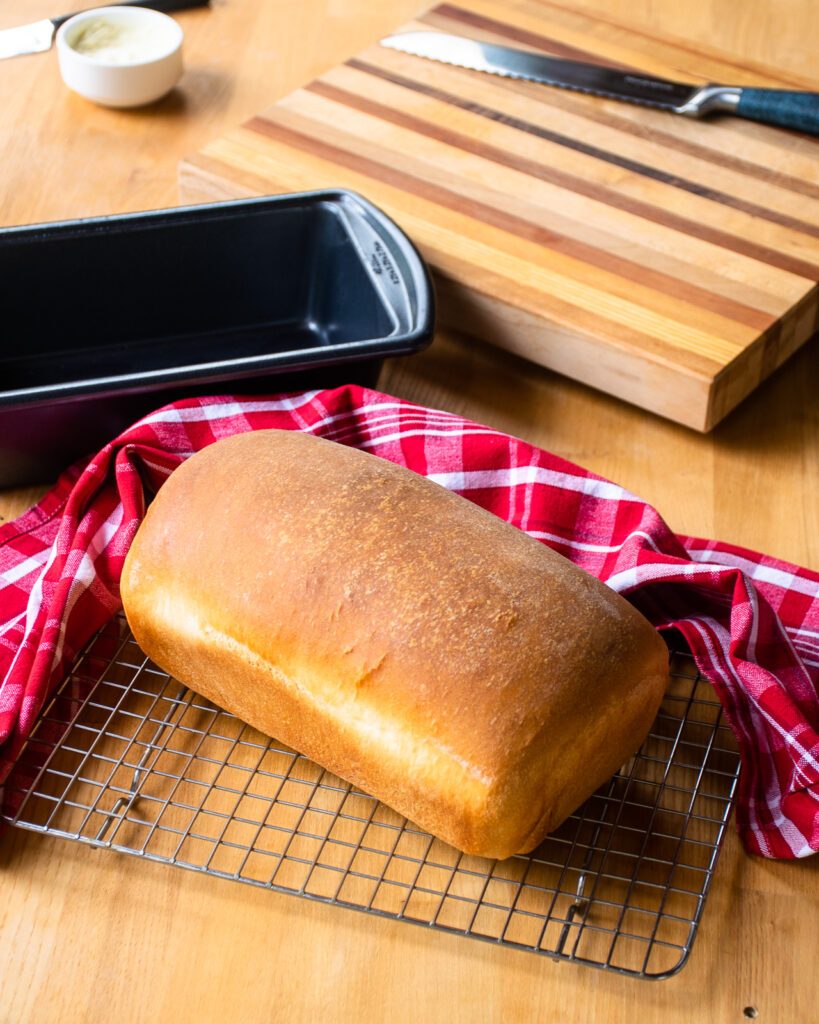
How to Store Homemade White Sandwich Bread
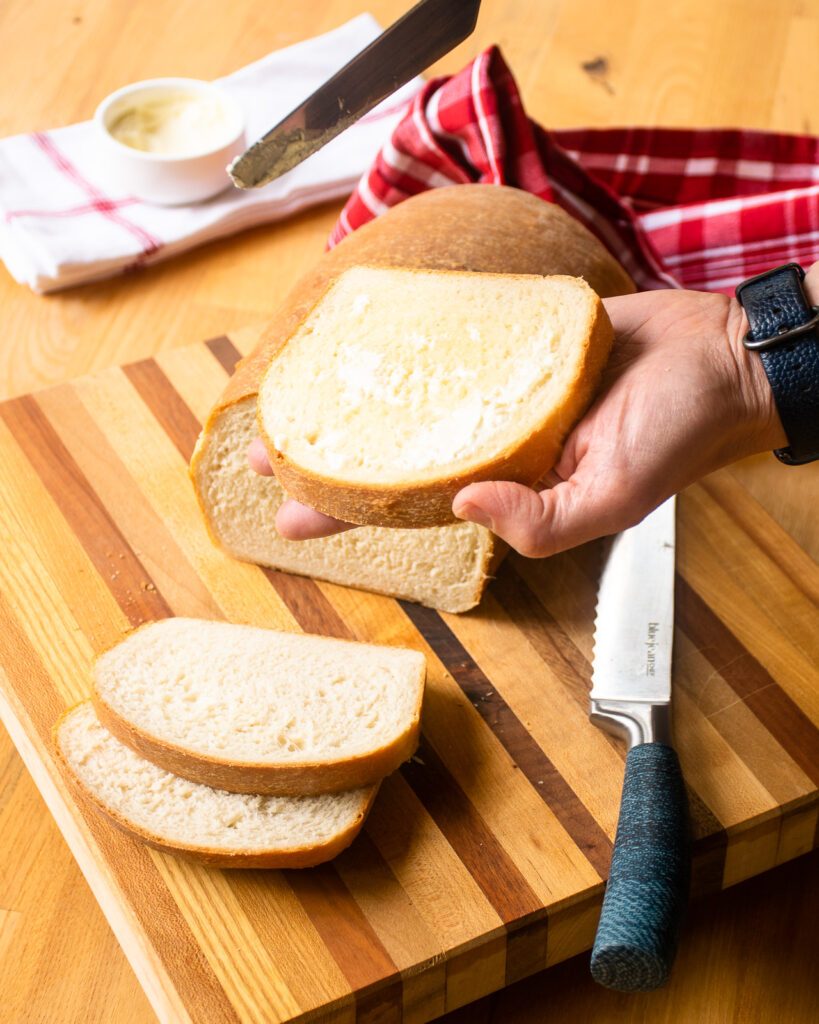
Homemade white sandwich bread is best eaten within a few days of baking, but it can also be stored for later. To keep the bread fresh, store it in an airtight container or plastic bag at room temperature. You can also freeze homemade bread for longer storage. To freeze, wrap the bread tightly in plastic wrap and place it in a freezer bag. Thaw the bread at room temperature before serving. I really enjoy this bread the day it is baked. On day two, it’s great for sandwiches. On days 3 to 5, it makes great toast!


That is 1/3 cup of milk?
Yes, it is ⅓ cup of milk. The recipe has been corrected. Thank you!
I don’t have the strength or counter space to knead bread. Can I use this recipe in my bread machine?
You should be able to make this recipe in your bread machine. Here are some tips that may help you when converting recipes for bread machines. https://www.kingarthurbaking.com/blog/2018/04/30/how-to-convert-recipes-to-a-bread-machine
Can I use dough function on bread machine to make?
You should be able to make the dough in your bread machine. Here are some tips that may help you when converting recipes for bread machines. https://www.kingarthurbaking.com/blog/2018/04/30/how-to-convert-recipes-to-a-bread-machine
Can I use bread flour?
Hi Diane,
Yes, you can absolutely use bread flour. The bread flour may absorb more liquid, so you might find the dough a little stiffer, but you’ll still get great bread. I’ve used both successfully.
Should i sift bread flour ?
No, there’s no need to sift the bread flour.
ML
Is the quantity for the instant, or active yeast the same? I feel like 2 tsps for the instant one is a a little too much….thank you.
Hi Diane,
When baking in large quantities you do use less instant yeast than active yeast (about 25% less). In a recipe that is just for one loaf, you will be fine using the same amount. The recipe was tested with instant yeast.
ML
We made this with bread flour the best recipe for soft white bread
I had to keep adding flour as I was mixing and the dough never pulled away from the bowl. I added even more flour when kneading and dough still seemed very wet I’ve got it rising now, but I’m not confident this will turn out. Any tips on what I did wrong, followed recipe to an t. 🤷🏻♀️
Hi Debbie. I don’t know how the bread turned out for you, but my first question would be whether you measured the ingredients with a volume measure or a weigh scale. Weighing ingredients is much more accurate than volume measures. That could be the first reason why perhaps your dough was really wet. There are also things like humidity and weather that can affect bread making too. Since we can’t control for that, you should always feel free to add more flour and also let the dough sit – it absorbs more flour over time. Chances are that if your dough was wet, it was a pain in the neck to manage, but probably came out really nicely.
I just came across this bread recipe, I use to watch your show on t.v. years ago and loved your recipes and your kitchen set up. Your red stove, I believe was a great add to a pop color on set!
Anyway I have made this bread four times so far since finding your recipes again. I baked a few for my daughters and then share along the recipe with them and they baked it perfectly!!!
Thank You
I use the dough setting on my bread machine with a VERY similar recipe from King Arthur Baking, do the final rise in a regular bread pan, and it works perfectly!
I made this bread and it was delicious. Your recipes are perfect. It’s easy to tell you write them for home cooks. Thank you for the effort you put into making them so easy to follow. The videos are great too.
I’m fairly new to bread baking. Can buttermilk be substituted for the regular milk?
Hi Cathy. Yes, you can substitute buttermilk. It will give the bread a nice tang. You may need to add a little more than when using milk, just because buttermilk tends to be thicker.
ML