Sourdough is Magic
I truly believe this. The whole notion that you can mix flour, water and salt together and get something as beautiful as sourdough bread can only be explained by magic. Or… well, science I suppose. Still, every time I make a loaf of sourdough, I feel like a magician and if you have the time and energy to devote to it, I think you’ll feel exactly the same way.
Sourdough bread has been made for years around the world and all recipes for a plain sourdough bread are roughly the same. No-one has a copyright on sourdough bread. I learned most of what I know, however, from the Tartine Bakery and need to give them credit for my version of the classic. I have adapted their bread recipe and techniques for this recipe, adding some imperial measurements and making just one loaf at a time.
Sourdough Starter
Let’s start at the very beginning, and that beginning is a starter. (confusing?) Most homemade bread recipes start by adding yeast to flour and water, along with perhaps a couple of other ingredients, but what makes sourdough different from most bread is that it uses a sourdough starter instead of store-bought yeast. It’s the sourdough starter – a combination of flour and water that traps wild yeasts and bacteria from the air around you – that gives flavor and rise to sourdough bread. You can buy sourdough starters from some well known bakeries like King Arthur Flour, or you might be lucky enough to have a friend give you some of their starter. But you can also make your own starter from scratch and it’s not difficult at all. It just takes a couple of weeks. Learn all about it in the BJC Cooking School here.
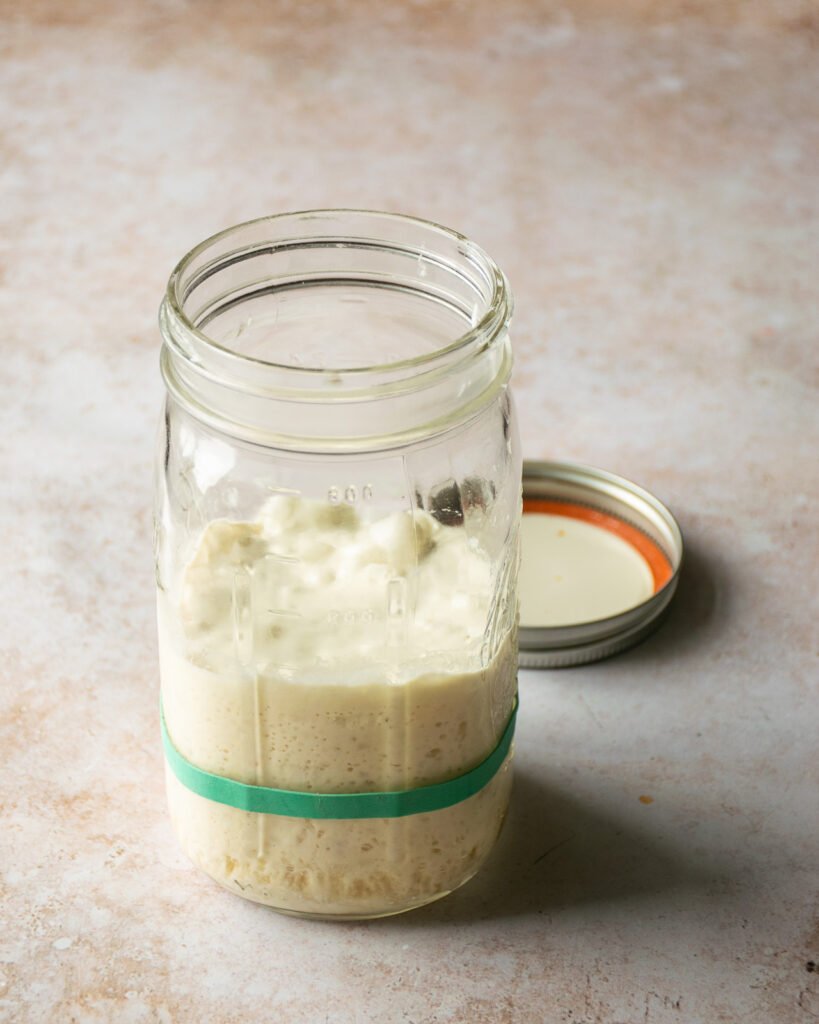
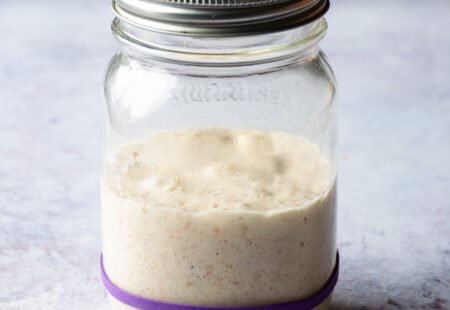
Making a Leaven/Levain
Once you have your starter living happily on your counter or in your fridge, you’re ready to make the bread. First, to help develop flavor, we make what is called a leaven. A leaven is basically the same thing as a starter – it’s a mixture of starter, flour and water and it is used to pre-ferment the dough, giving it more flavor. I always make a leaven before making my dough because my starter lives in my fridge and needs a little boost at room temperature to wake up before being asked to do a lot of work in a full blown dough. To make the leaven, you combine some starter, flour and 80ºF water in a jar and let it rise for at least 6 hours, or even overnight. You’ll know when the leaven is ready to use because a little piece of it will float in water. I either make my leaven the night before I intend to mix my bread, or at the crack of dawn the same day.
Making the Dough
There’s no real kneading of dough in this recipe. You just mix the leaven with more water and flour and combine everything until there is no dry flour remaining in the bowl. Then, you let the dough rest for 30 or 40 minutes before adding the last remaining ingredient.

Key Ingredient: Salt
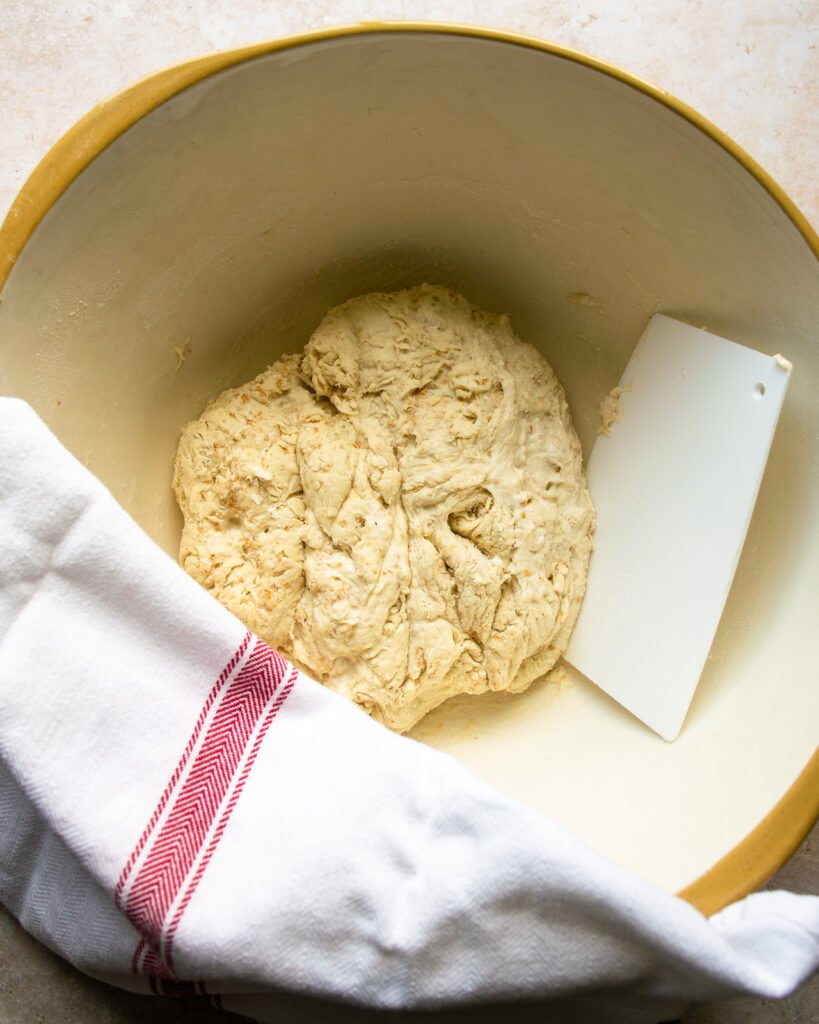
Salt is critical to so many things, but especially to bread. Bread without salt is like the sky without the sun. It’s sad. The salt is not added to the dough when it is first mixed because salt inhibits yeast activity. So, the dough and yeast get a head start and then we add the salt. I like to dissolve the salt in a little more water and then squeeze the water into the dough until it is combined. It can look scrappy at first, but then by pulling the dough over on itself, turning the dough 90º each time you turn it over, it will become a uniform blob of dough. It doesn’t need to look pretty at this stage. (see photo below)
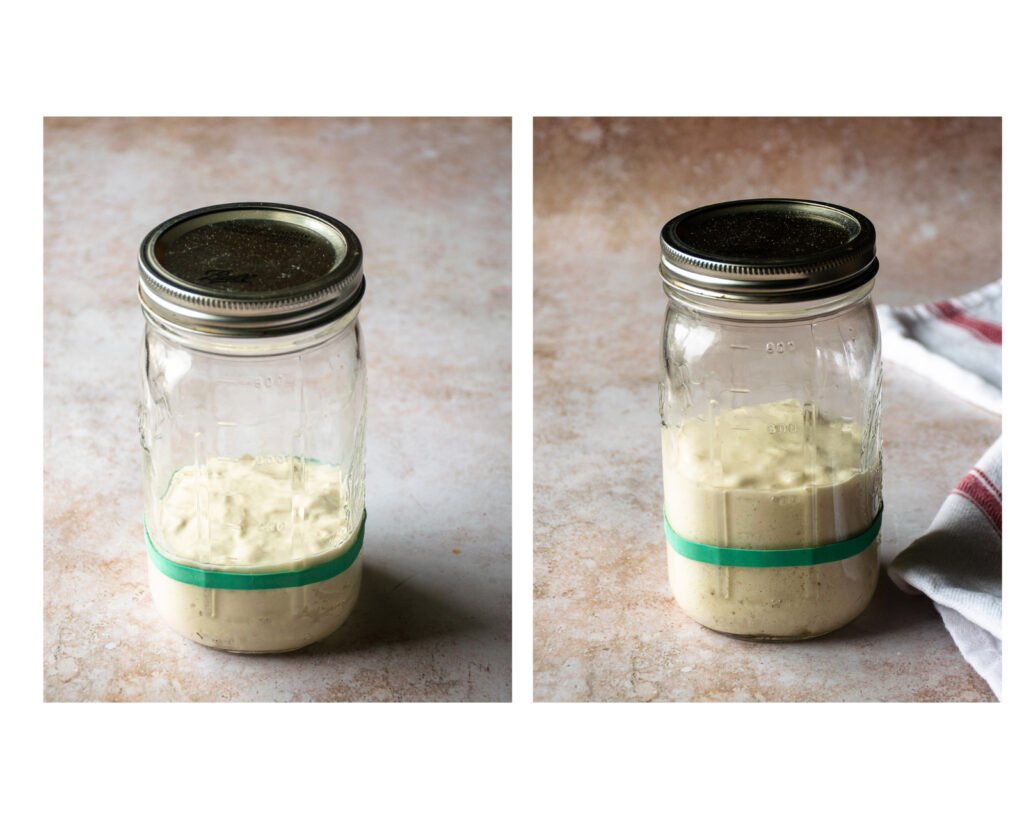
Letting the Dough Rise and Ferment
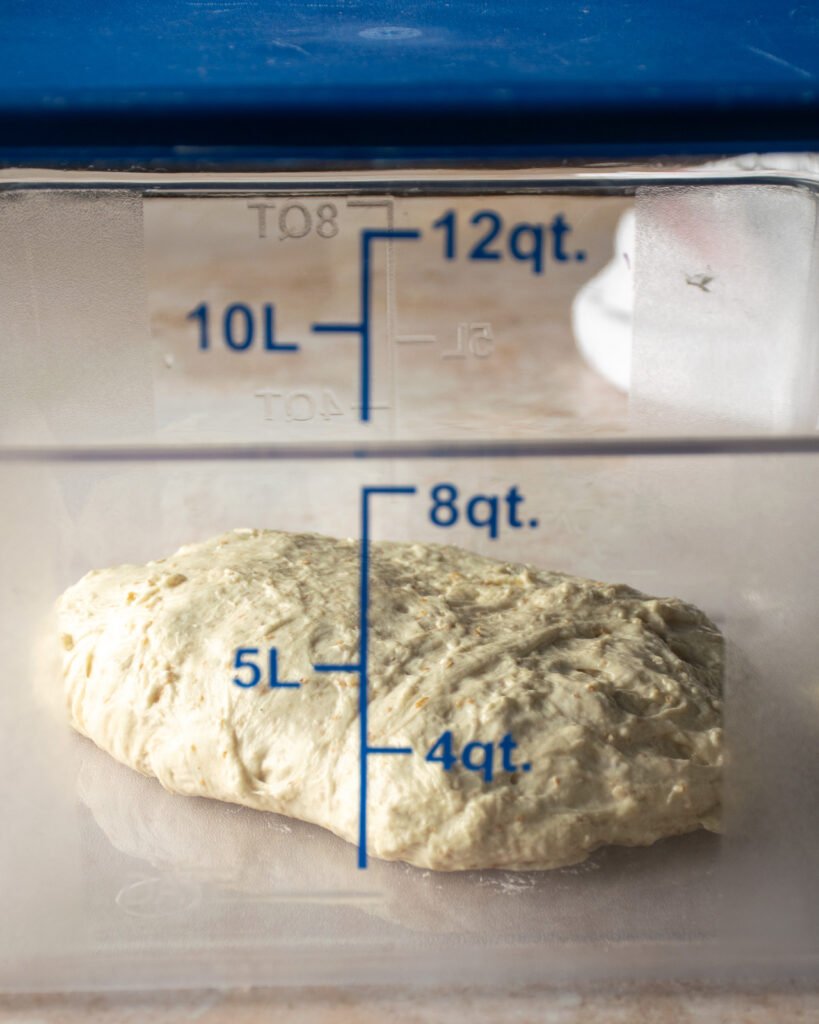
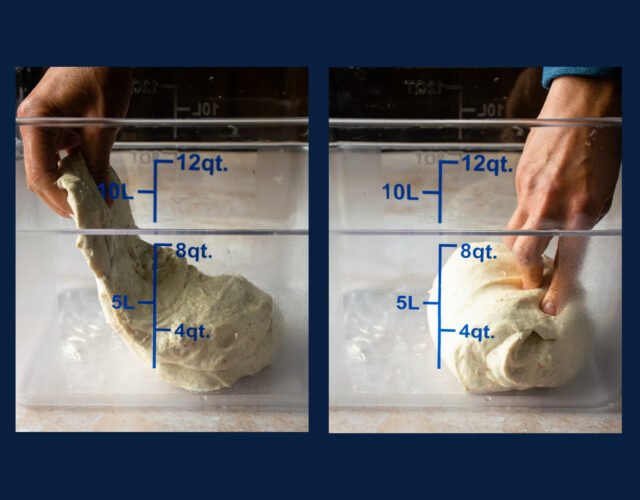
Place your mixed dough into a lidded container or covered bowl for the next stage: bulk fermentation or rising time. This is really unattended time. You just get to watch and feel the dough change, but a lot is happening inside. The yeast is enjoying a perfect environment and reproducing and emitting gases to help the dough rise and develop flavor. I like to use a clear container so I can see how it’s doing. It will change over time, as you’ll discover.

Turning the Dough
While there is no need to knead, you do have to turn the dough over on itself every 30 minutes or so while it rises. This just involves grabbing one side of the dough and folding it over on itself. Then, turn the container or bowl 90º and fold it again. Fold all four edges of the dough this way and you’ve completed one “turn”.
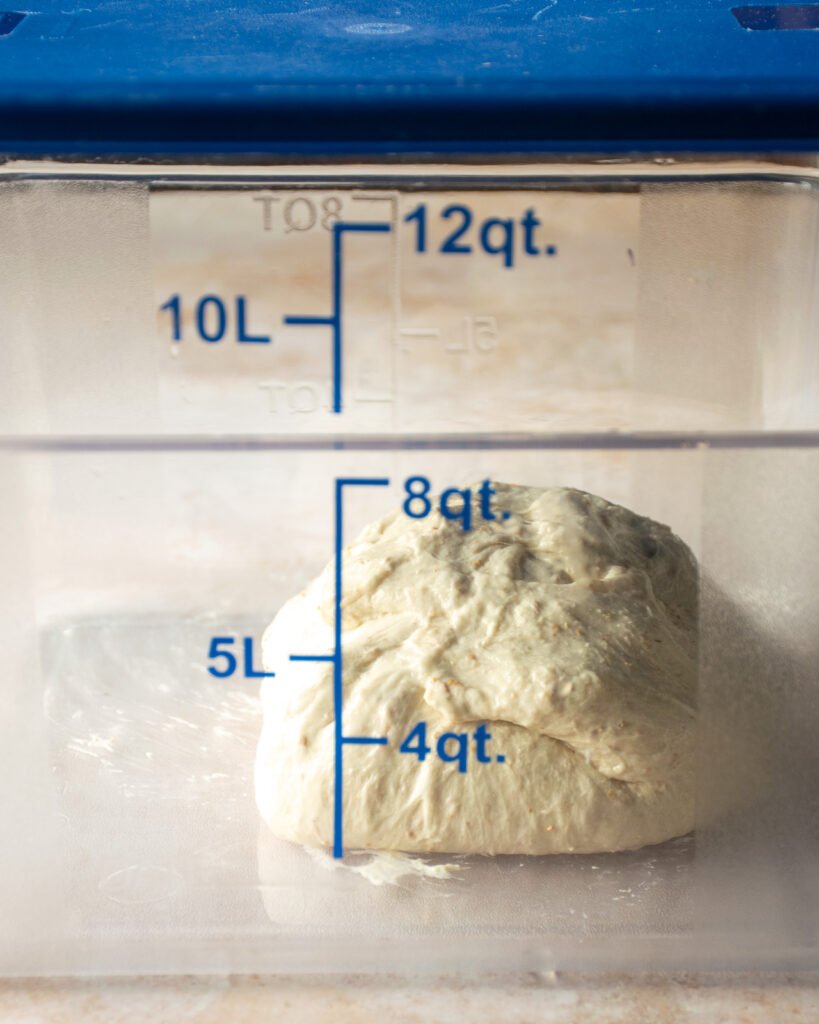
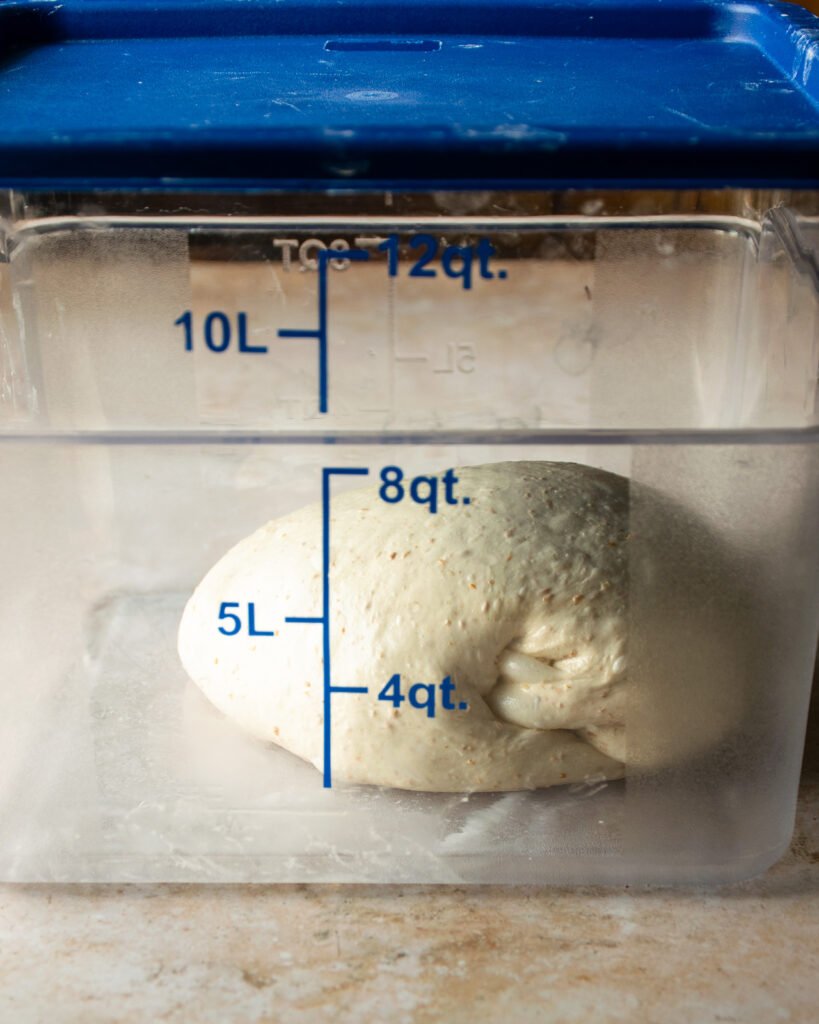
As you turn the dough each time, you’ll notice it getting smoother and bigger, lighter and fluffier. This is the yeast doing its thing – reproducing and emitting gases which helps the dough rise. As the dough becomes lighter, turn it more gently each time or pick it up with two hands in the middle and let the ends fold under the dough.
Fermentation Time
The time it takes for the dough to rise depends on your room temperature. A warmer environment means a shorter fermentation (or rising) period. If your room is cooler, the dough will still rise, but it will take longer to do so. I’ve had a rising time of as little as 3 hours, or as long as 7 hours. Know, however, that faster does not mean better. The longer it takes for the dough to rise, the more time it has to ferment which means the more flavor it will have. After several hours, the dough will have changed completely. It should have a smoother surface and feel very light and airy.
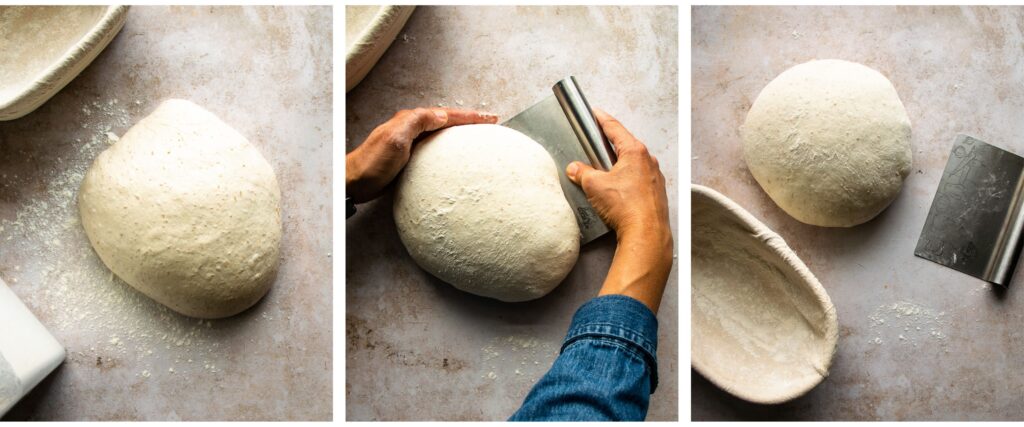
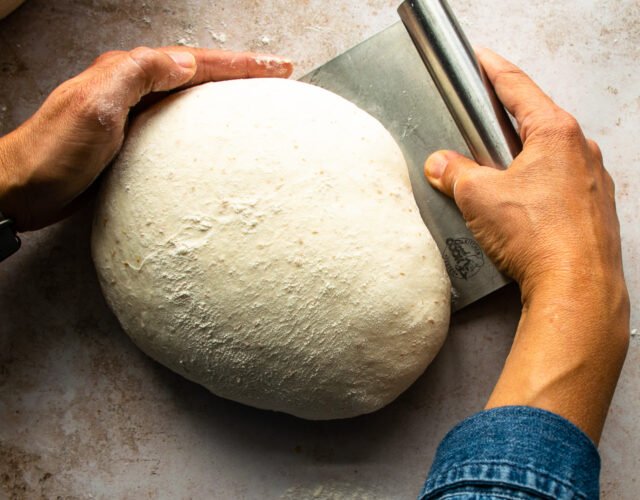
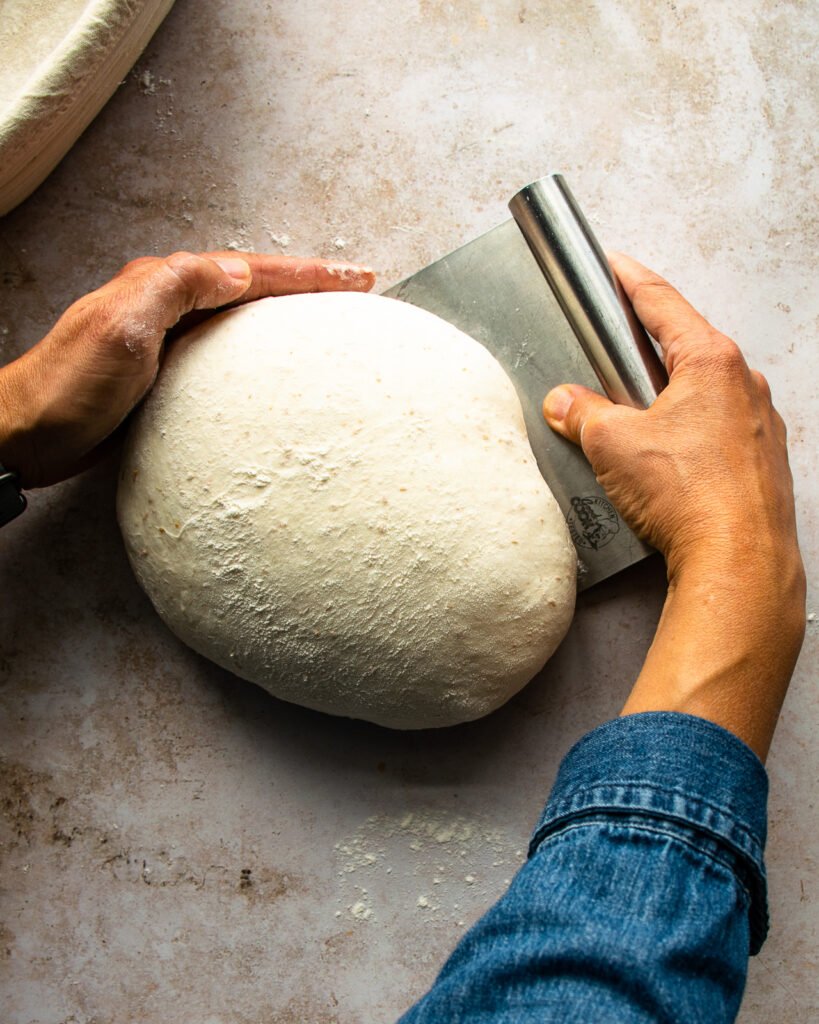
The First Shaping
Now comes the time to shape the dough. There are two stages to this. First, dump the dough out onto a floured surface. Then, gather the edges of the dough up to the center (like a beggar’s purse), flip the dough over and use a bench scraper to pull the dough towards you a few times, tucking the edges under and shaping the dough into a ball. In this stage, we’re trying to stretch the top of the dough a little while we tuck the bottom of the dough under (like tucking in sheets on a bed), building tension in the dough. This can take a little practice, but when you’re finished with this stage, the dough should just look like a round boule. Let it sit for 20 minutes because it’s just worked out and needs a rest.
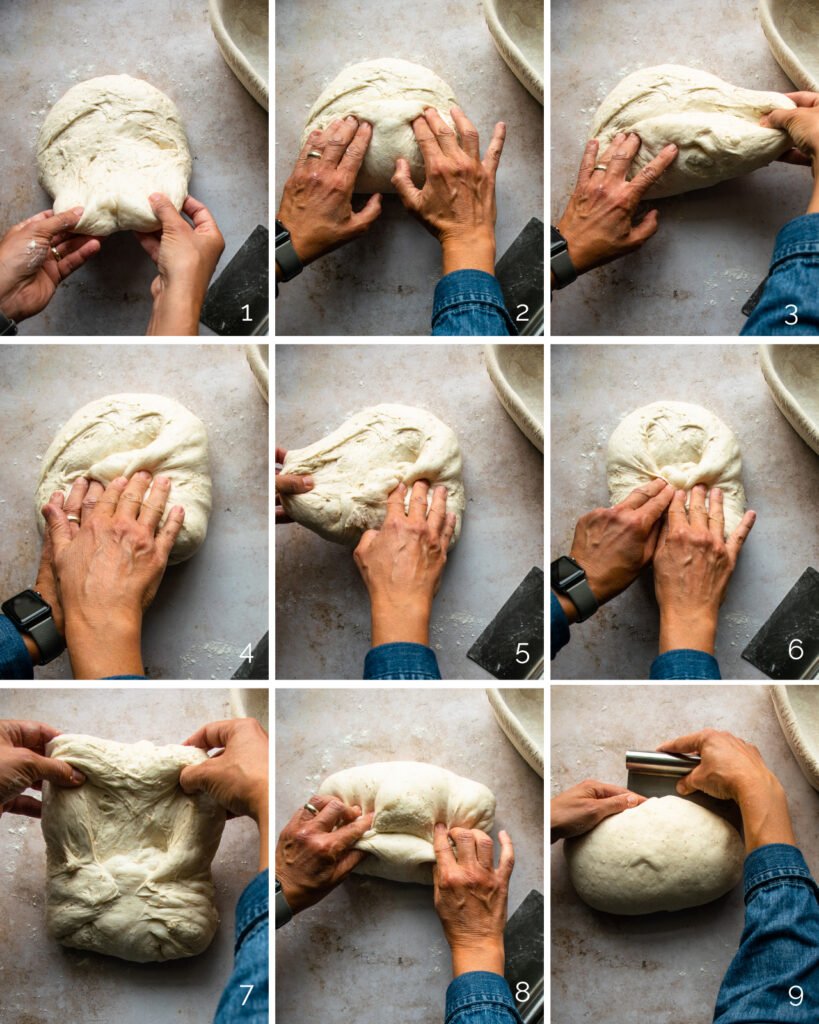
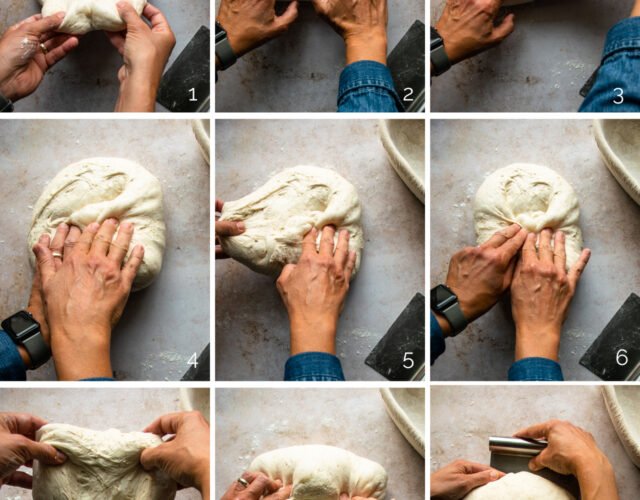
The Final Shaping: Folding the Dough
The second stage of shaping requires a series of folds which I’ve tried to show you above. Flour the surface of the rounded and rested boule and flip it over onto the counter so the floured side is down. It should be relaxed enough that it oozes and flattens a little. Fold the bottom of the dough up away from you and fold it on itself. Then, pull one side of the dough out and fold it in towards the center. Repeat with the other side of the dough. Finally, fold the top of the dough down to the middle and flip the dough back over. Use your board scraper to tighten the dough again, pulling it towards yourself.
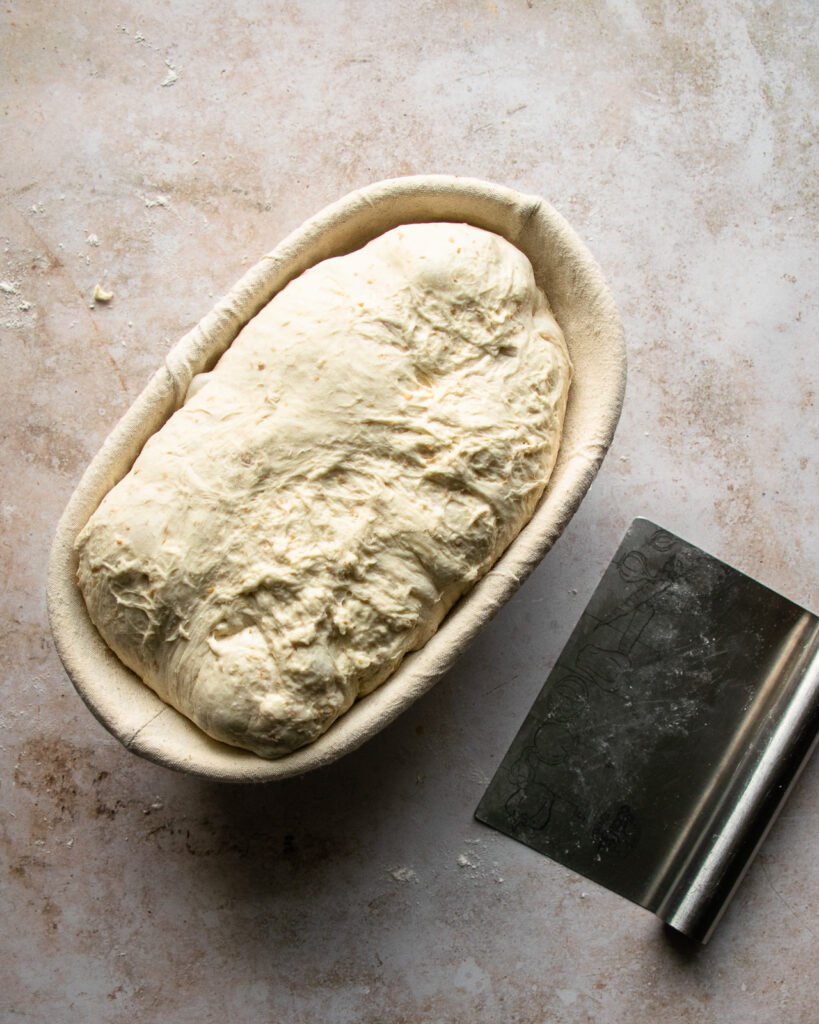
Final Rest
That’s a big workout for a dough ball, so it now needs a significant rest and recovery period. You’ll need a vessel to hold the dough in shape for this rest. You could use a bowl lined with a tea towel, or a banneton like the one above – a rattan proofing basket. Dust the banneton with rice flour to help prevent the dough from sticking. Place the bread, seam side up into the banneton, pop the banneton into a food safe plastic bag and then transfer the dough to the refrigerator. You’ve done enough work for today.

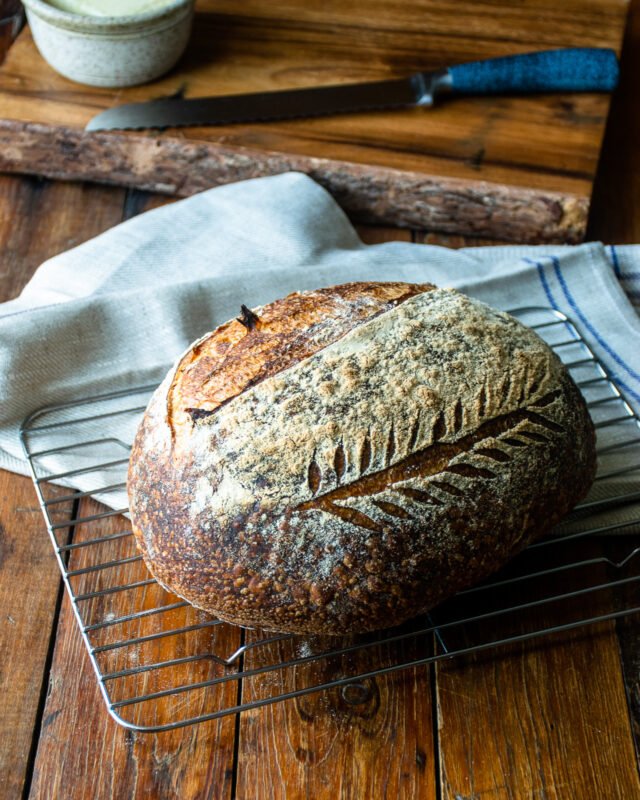
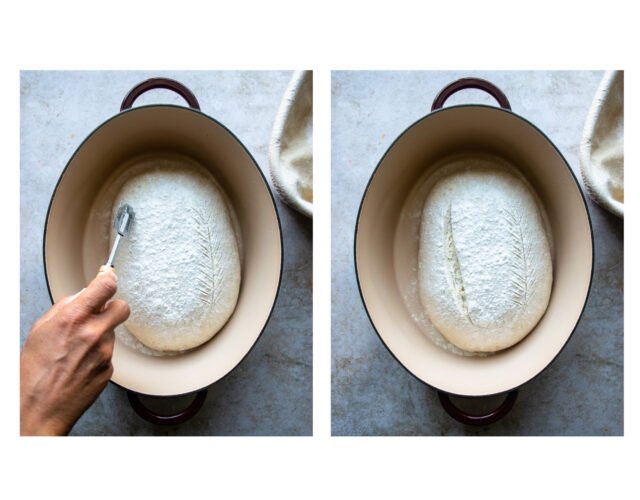
Slashing the Sourdough
Bake day is one of my favorite days. I wake up excited and the first thing I do is take my sourdough loaf out of the fridge and pre-heat a cast iron pot in the oven to 500ºF. I do this even before coffee! Once the oven and pan has pre-heated, it’s time to bake. Carefully transfer the dough to the (smoking hot) cast iron pot by carefully inverting it into the pot. Then, it’s important to slash the dough. We slash the dough because there is air in the dough that needs to escape. If we don’t give it a direct route out of the bread, it will make its own way out and form an ugly crack. You can slash the dough with a cross in the center, straight down the middle, along the side or wherever you like. You can also make a little pattern in the dough with shallow cuts, but you’ll need a big slash too. If you do decide to make a pattern in the dough, it’s important to dust it with flour first. The flour on the surface of the dough outlines your pattern when the dough rises, allowing the pattern to really shine.
Reduce the heat to 450ºF and bake the sourdough with the lid on for 20 minutes. Then remove the lid for 20 minutes until the dough takes on a dark color. You can let the dough cool a little in your cast iron pot, or you can remove it to a cooling rack (carefully because it is HOT).
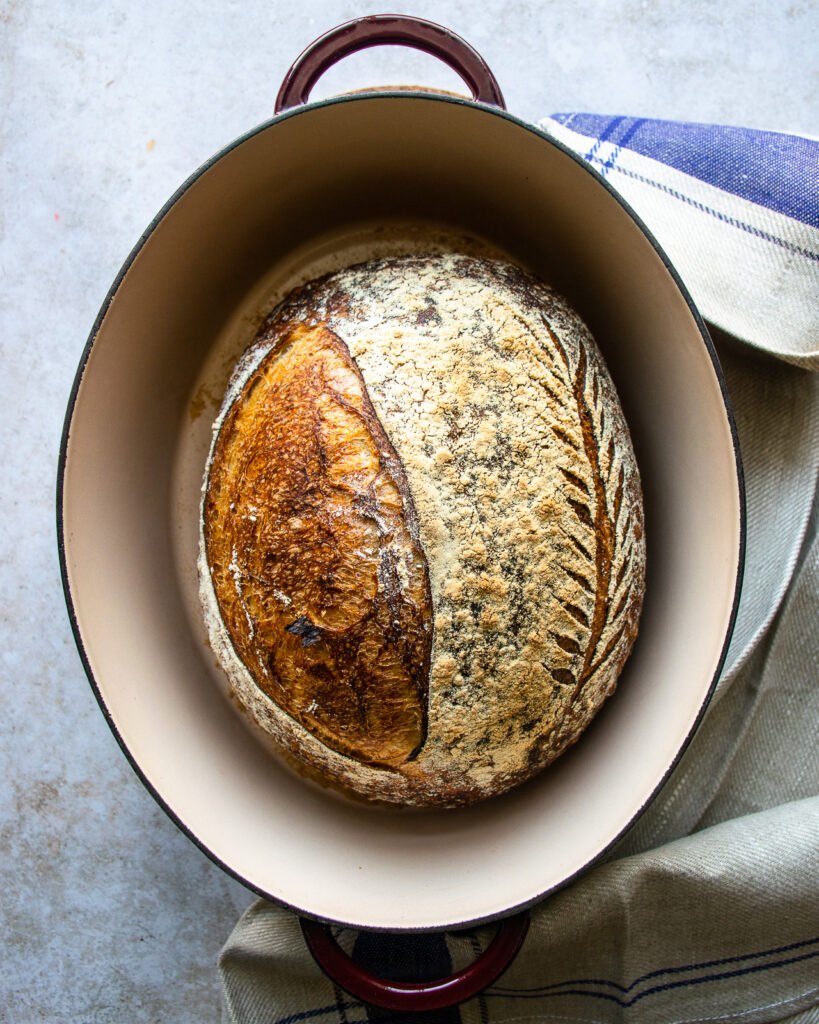
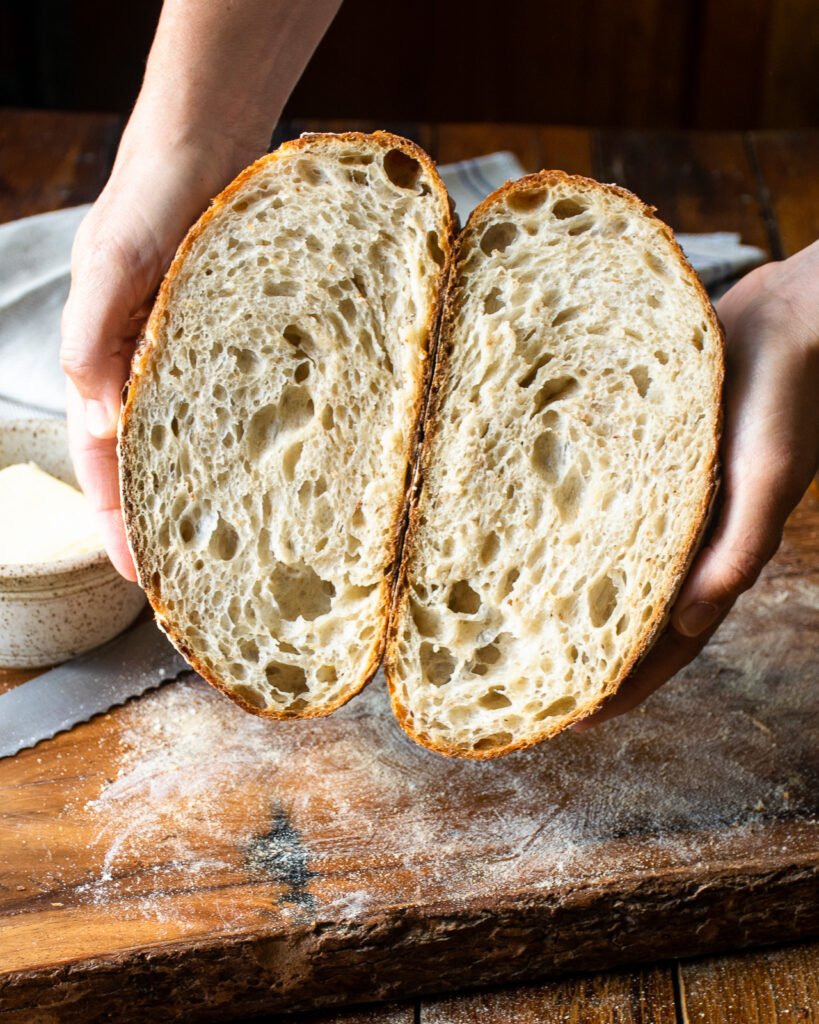
So Worth It!
Look what you did! Aren’t you proud? I’ve baked more loaves of sourdough than I can count, but I’m proud of myself every single time. Each loaf is different, some more beautiful than the others, but they all taste fantastic and come with great benefits. Sourdough is more flavorful than other breads and has a really great chewy texture, but it’s also easier to digest and more nutritious than regular bread. You can learn more about the nutritional benefits of sourdough here.
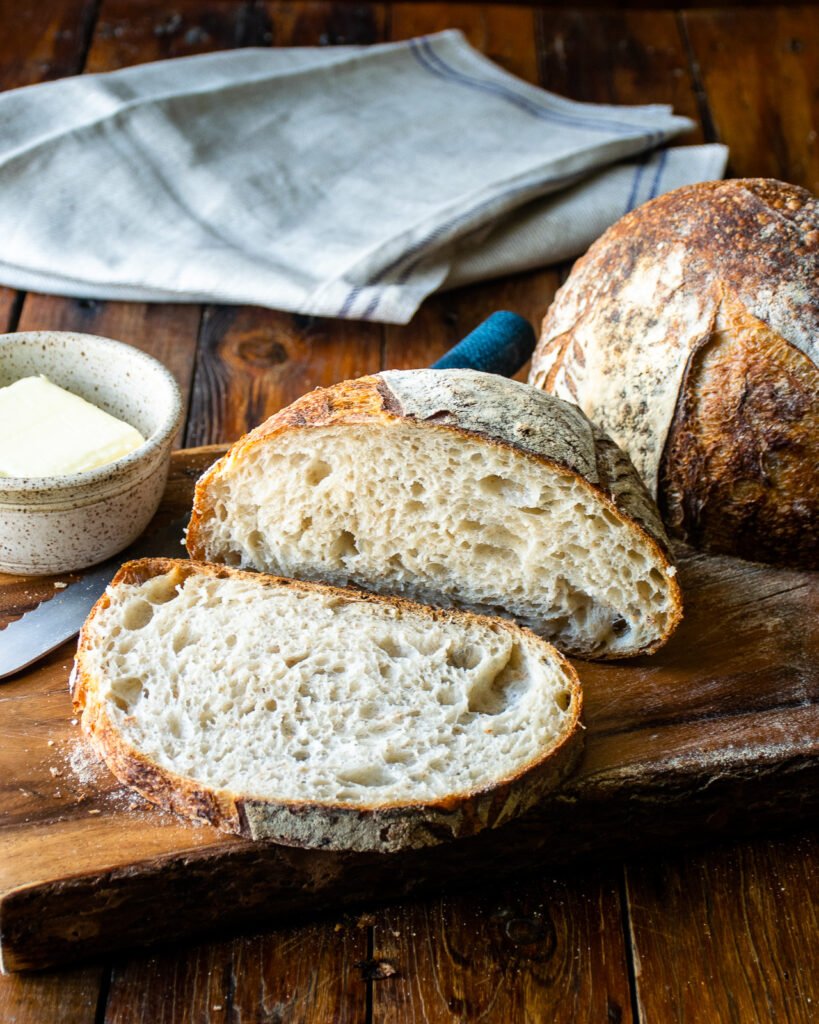
How to Store Sourdough
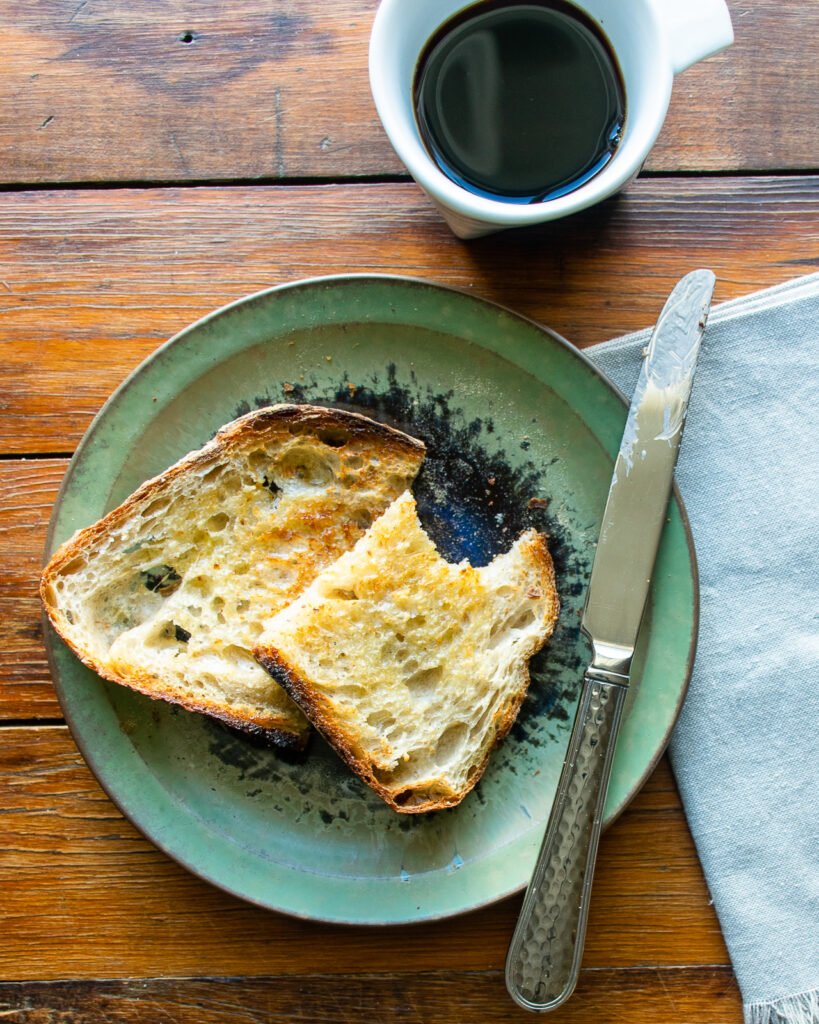
One of my favorite features of sourdough, however, is that it lasts longer than other homemade breads. I leave my loaf out on the counter overnight on the first night. If I’ve cut into it, I just place the cut side down on the cutting board. I like the crust better the second day as it hardens a little. If the dough is still around on day 3, I’ll put it into a plastic bag at that point. Sourdough keeps easily for up to a week and half. As it ages, it’s better toasted than raw, but delicious all the same.
Are you up for it?
So, clearly, making sourdough bread is a commitment, but if you like baking for joy or enjoy the science of baking, few things are more gratifying to make. It’s magic after all.


I just finished baking your sourdough bread recipe. I’ve tried other recipes but yours turned out the best. The pictures along with the directions really helped! The only thing I did differently because of my non-cast iron Dutch oven, was to use a cold Dutch oven baking method. Thank you for the great recipe!
Thanks so much, Tom! So glad you had success.
I just looked at the recipe and I need it in US measurements.
Hi Cynthia. I understand. To accommodate for US measurements, I put a quick and easy conversion chart in the article right above the recipe. Take a look there.
ML
I am anxious to try this recipe. However, I cannot find a whole wheat flour that specifies “bread.” What kind of whole wheat flour do you use?
Use the whole wheat flour you have, even if it doesn’t say “Bread”. The majority of the flour is white in this recipe, so you should be fine using white bread flour and regular whole wheat. I order flour from Baker’s Authority when I’m in the US and I use Robin Hood flour in Canada.
For the morning of baking should I just leave the dough out fo the refrigerator for the 30 minutes to preheat the oven or should it be out longer?
Hi David. I find that the 30 minutes is plenty of time for the dough to sit out. I get a great lift in the dough once it’s in the cast iron pan in the oven.
Hi Meredith,
I enjoy your approach and tips. I just read your sourdough recipes and noticed the ingredients were written with “G” , I assume gram measurements. Would it be possible to use both ways for ingredients, ie. standard and metric systems in your recipes? I was excited to see a recipe for sourdough bread but the measurements were a turn-off.
Thank you for all that you do. I miss you on the QVC network.
Respectfully,
Joyce
Hi Joyce, I use grams because weighing ingredients ensures the most accurate measurements and grams are more accurate than ounces. I do suggest picking up an inexpensive scale for this recipe, but I also give you a chart on the sourdough starter page you can use to convert the grams to cups and ounces. I hope you give this sourdough bread a try, it is so rewarding! https://bluejeanchef.com/cooking-school/how-to-make-a-sourdough-starter/
Please include teaspoon, tablespoon, and cup measurements for those of us in the U.S. I, for one, am not able to use grams.
Hi Darlene. I’ve given you rough volume measurements so that those without a scale can try their hand at sourdough bread, but I have to let you know that you won’t be as accurate or consistent if you use volume measurements. Check out my article on how to make a sourdough starter which tries to explain why I use grams. https://bluejeanchef.com/cooking-school/how-to-make-a-sourdough-starter/
King Author Flour also has a pretty complete conversation table.
I have been using a scale and it really makes a difference. No guess work.
I just made this bread recipe and it was a huge success. I’ve been making sourdough breads for 5 years and now feel like I’ve finally achieved what I set out to do. When I presented the loaf to my friends and family, I was very proud. Thank you. Your instructions were a great help and my bread tastes great. Now I’d like to make the same style of loaf using more whole wheat flour, rye or multigrain.
Unbelievable! The bread looks super duper, fluffy and delicious. I will surely try this recipe at home. A dash of clarified butter with this freshly baked sourdough bread, oh, a perfect combo! Thanks you for sharing this recipe.
Hello Chef Meredith!
I have been following you for a long time, love your teaching and your recipes! I just completed my very first sourdough loaf in my BJC cast iron skillet with lid! I’m so excited, the house smells heavenly! Quick question, I’m sure I just missed this, but I made the starter and I made the leaven. When I take about 1/2 cup of leaven to make the dough, what do I do with what’s leftover? Does this go back into the starter? I don’t have quite 1/2 cup leftover for another loaf, but didn’t want to discard it, so meanwhile popped it in the fridge. Thank you for everything!
You can use the discard for other recipes such as sourdough biscuits, pancakes or pizza dough. Meredith has recipes for these on the website. Just search “sourdough” and the recipes will come up. You can also gift the discard to a friend to make their own sourdough bread. A gift that keeps on giving!
Your pet photos bring so much joy to my feed! The love and happiness captured in each picture are infectious. Give your furry friend some extra pets for me!
In process of making this now. Moved and couldn’t put my hands on the tarting bread recipe and up you popped with really great directions. I have been making this bread since 2020 its variations and it’s always good.