White Chocolate Peppermint Bark

This is the chocolate bark that you see around cookie trays at Christmas time... at least you hope to! It's easy to make, but since there are only four ingredients make sure you get the best quality ingredients possible.

Jump to Recipe (or scroll for photos and riveting information...)
Advertisement - Continue Below

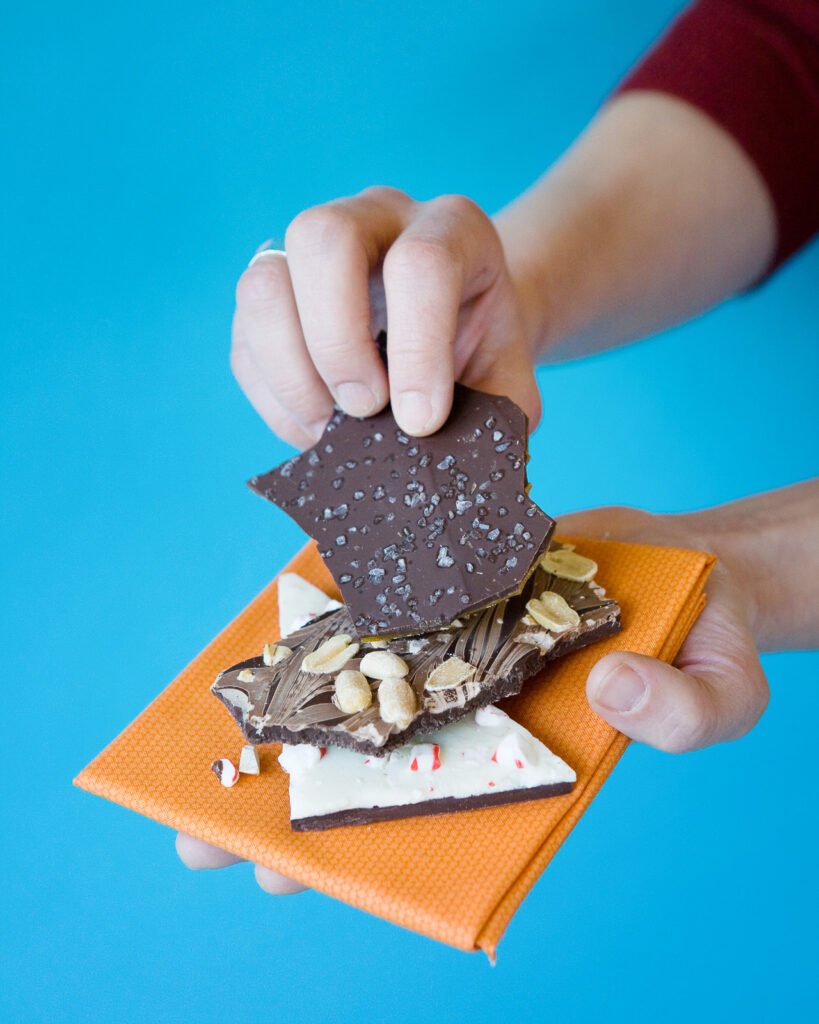
While white chocolate peppermint bark has become the traditional bark that you see at the holidays, there are many different varieties of bark that you can make. You can swirl two different chocolates together, you can add nuts, you can add dried fruit, you can even layer it with a layer of brittle as I did in my first cookbook, Comfortable in the Kitchen. (you can see some of those different barks in the photo below) The basic premise is always the same – melt the chocolate and layer it onto a cookie sheet, let it cool and break it apart. The trick to making bark is to melt the chocolate properly.

In a perfect world (or a chocolate factory), chocolate is tempered before being made into chocolate bark. Tempering is a process that keeps the chocolate shiny and retains its snap. It requires heating the chocolate to a certain temperature (115˚ F for dark chocolate; 110˚F for milk and white chocolate), cooling it to below 82˚F and then heating it again, but only to 88˚ to 91˚F and holding it there. That’s a lot to pay attention to, and makes chocolate bark more challenging than it needs to be. My recipes make the process much easier by doing what is called a “quick temper”. Reserving a quarter of the chocolate and adding it to the rest of the chocolate already in a melted state, brings the temperature down to roughly the right degree. The result is a bark that breaks neatly and has some shine to it.

Occasionally, chocolate can bloom, or look like it has a white dust all over it. This can happen when chocolate has not been properly tempered, or if the chocolate goes through temperature changes (into the refrigerator, out of the refrigerator, etc.) This does not affect the taste of the bark, but does affect the appearance. For this reason, make chocolate bark at most a day or two before you want to serve it. You wouldn’t be able to resist it for much longer than that anyway!

A hand holding several different types of bark on an orange napkin.

White Chocolate Peppermint Bark

  • Prep Time: 30 m
  • Chilling Time: 1 h
  • Total Time: 1 h 30 m
  • Servings:
    12

Ingredients

  • 6 ounces high quality semi-sweet chocolate at least 60% cocoa, chopped
  • 6 ounces high quality white chocolate chopped
  • ¼ teaspoon peppermint extract
  • 20 to 30 peppermint swirl hard candies or candy canes

Instructions

  1. Melt three quarters of the chopped semi-sweet chocolate in a double boiler or the microwave, stirring until smooth. When the chocolate has melted completely, remove the chocolate from the heat, add the remaining chopped semi-sweet chocolate and stir again until melted and smooth.
  2. Pour the chocolate onto a baking sheet lined with parchment paper, or better yet, use a silicone baking sheet. Tip the baking sheet to spread the chocolate out evenly, creating a smooth surface. Transfer the baking sheet to the refrigerator and let the bark set up.
  3. Melt three quarters of the chopped white chocolate in a clean double boiler or the microwave, stirring until smooth. When the white chocolate has melted completely, remove it from the heat, add the remaining chopped white chocolate and stir again until melted and smooth. Add the peppermint extract and stir to combine well.
  4. Place the candies in a sealable bag and crack them into pieces by banging them with a rolling pin or meat tenderizer. Stir the candies into the white chocolate.
  5. Pour the melted white chocolate on top of the dark chocolate on the baking sheet and spread it out to create a smooth surface.
  6. Transfer the baking sheet to the refrigerator and let the bark set up. When firm, break the bark into pieces and store in an airtight container. Serve within a day or two.
Advertisement - Continue Below

Leave a Reply

Your email address will not be published. Required fields are marked *