
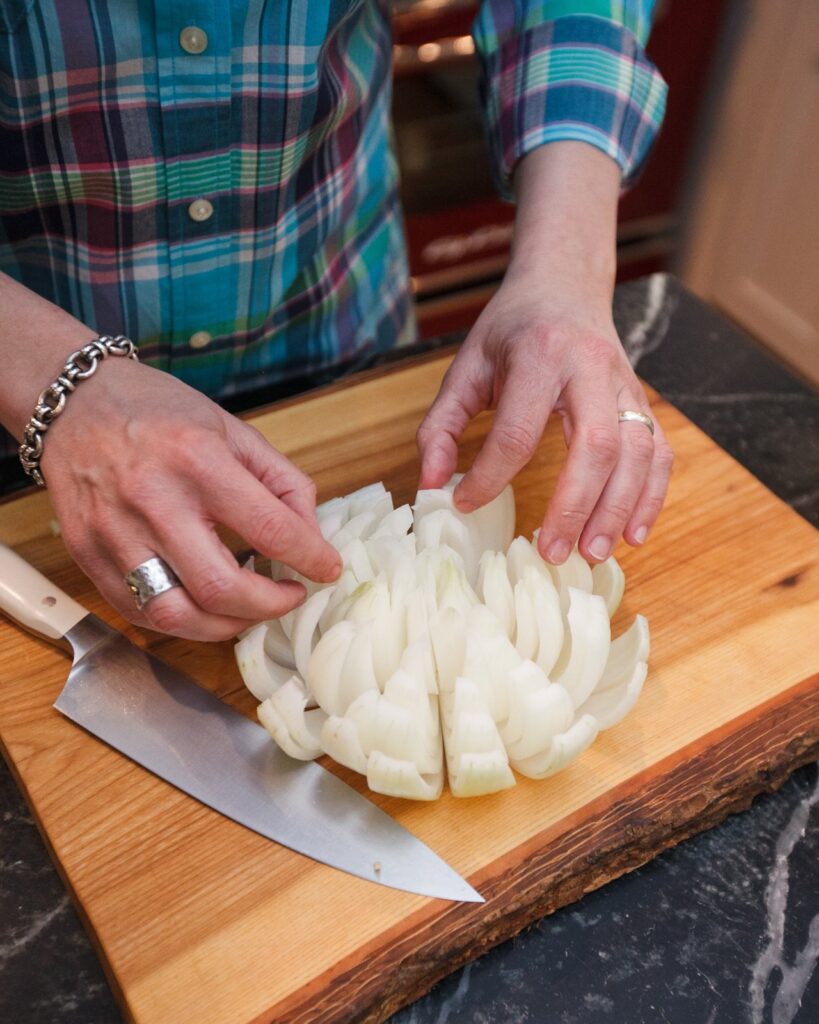
Indeed, the trickiest part of making a blooming onion is cutting it, but it’s not actually that hard. Just make sure you have a good sharp chef’s knife with a pointed end. The first step is to cut a nice flat surface off the top of the onion (the stem end). Then, cut as little as possible off the root end – just enough to allow the onion to sit flat. The root is the key to success in cutting the blooming onion properly. You want there to be enough root to hold the onion together AND you need to never cut through the root. Place the onion stem side down on the countertop and make four slices down the onion at 3, 6, 9 and 12 o’clock, BUT DON’T CUT THROUGH THE ROOT. Then, make 3 slices down the onion between each of the original four slices, but again… DON’T CUT THROUGH THE ROOT.

If you’re good at following instructions and were successful, when you turn the onion over, the onion will open up, but not fall apart because the root will still be intact. Use your fingers to help separate all the petals of the onion gently.
Blooming Onion Batter
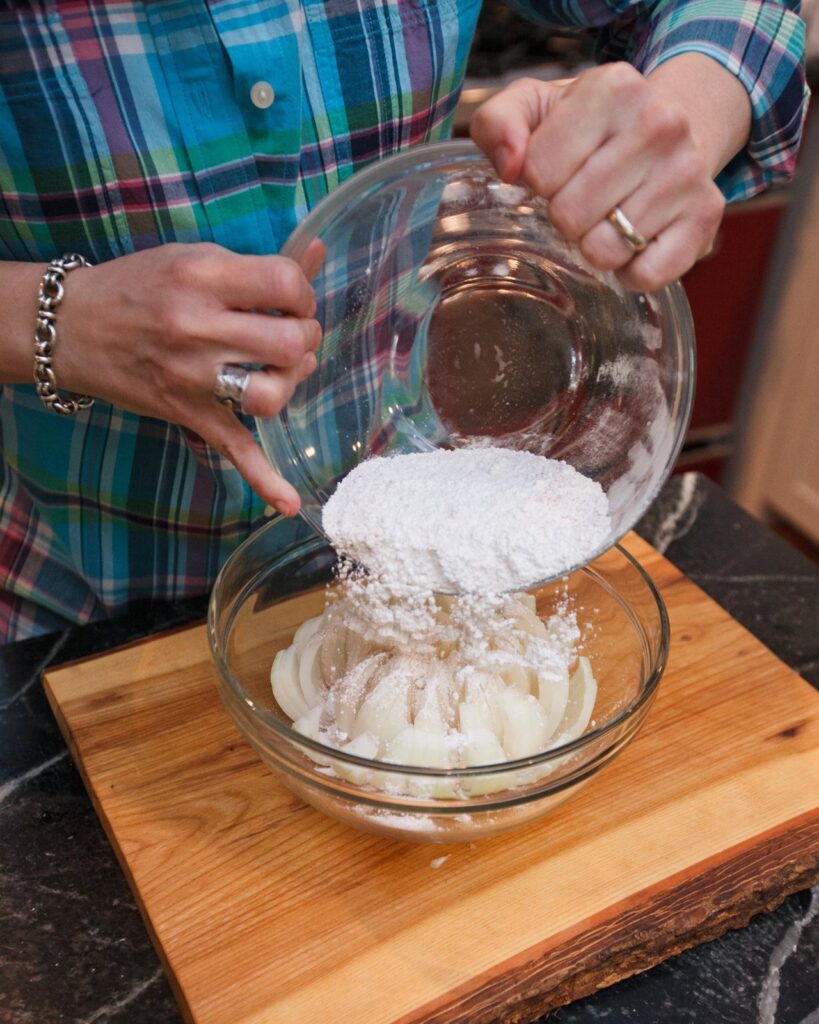
Next, you’ll need a series of bowls to make this messy job as tidy as possible, but even then, dredging a blooming onion is a pretty messy task. Stay patient and do your best. If an onion petal falls out, don’t worry about it. Everything looks different once it’s cooked. Place the onion in one bowl and sprinkle the seasoned flour over the top. Do your best to get the flour on all the petals of the onion. It doesn’t have to be exact or precise, but generally covered is better.
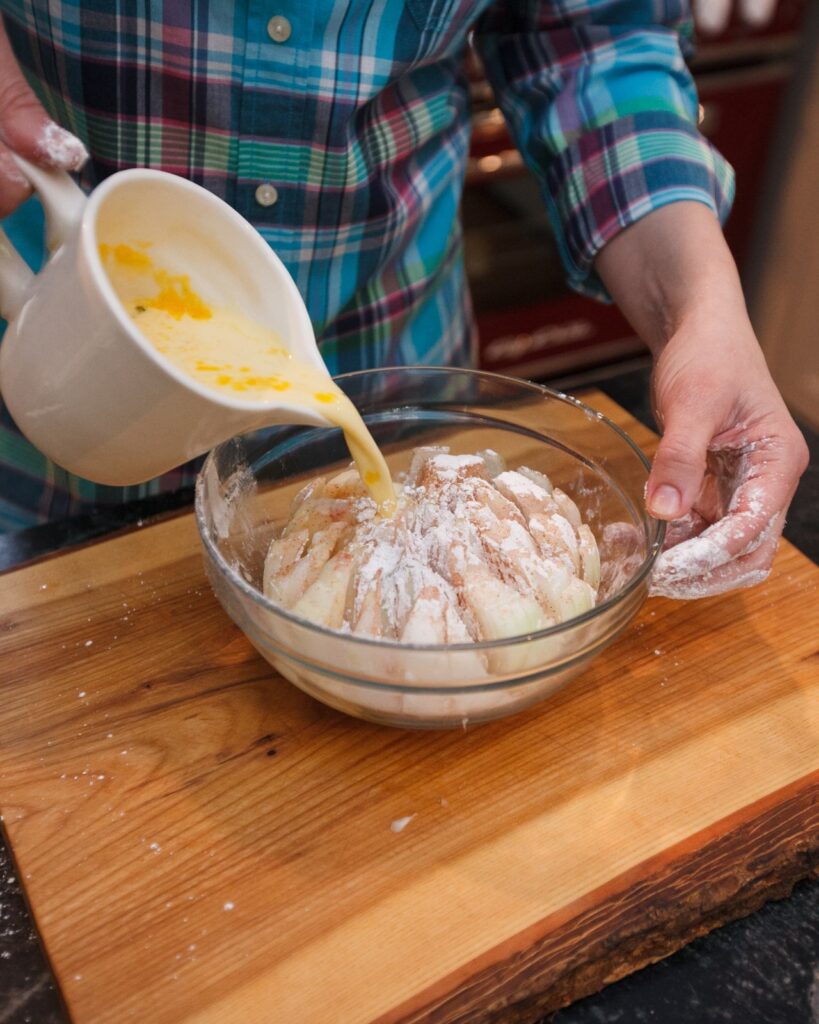
Then, transfer the onion to a second bowl (reserving the unused seasoned flour) and pour the egg mixture over the top. Again, use your fingers to spread the onion petals apart and get all the floured onion coated in egg.
Transfer the onion to a third bowl and pour the remaining seasoned flour over the top. One last time, do your best to get the flour on every petal of the onion, coating as evenly as you can.
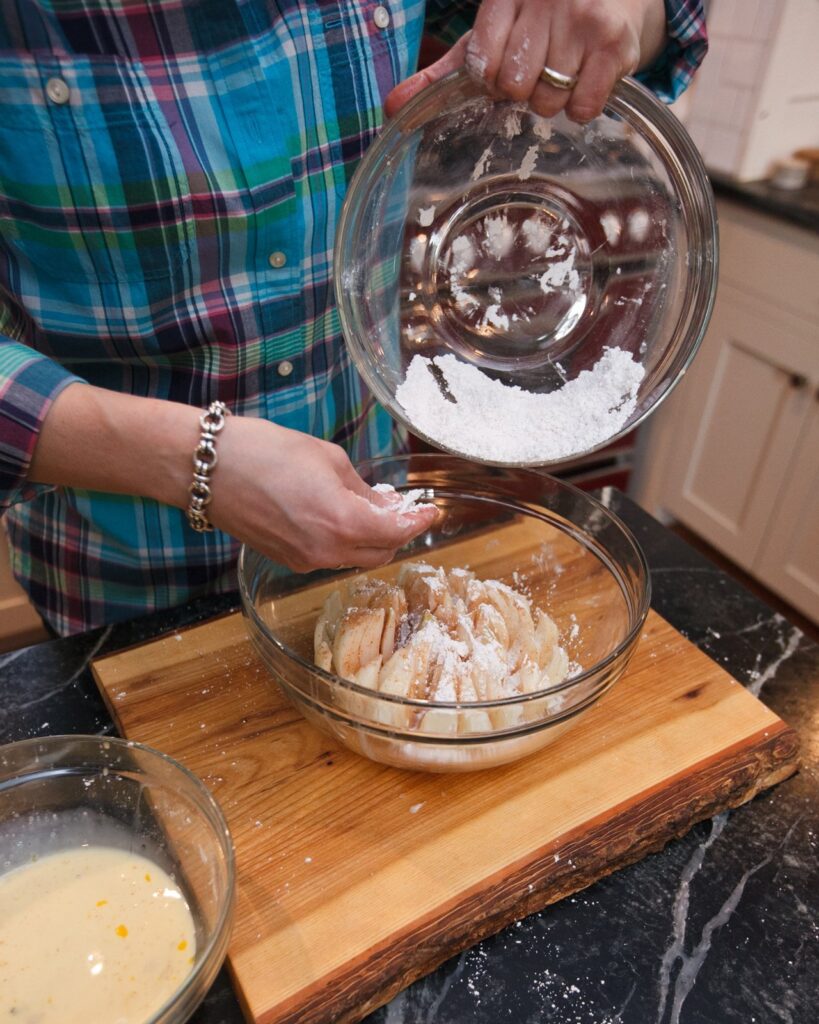
Then, tip the onion over to shake off any excess flour and get ready to air fry.
Air-Frying over Deep-Frying
Traditionally, blooming onions are deep-fried, which is why you usually only see them in restaurants. Deep-frying at home tends to be more challenging – it requires a lot of oil, which has to be heated, then cooled, then drained, and then stored or disposed of. Plus, deep-frying at home can leave that frying odor in your house and some people find it intimidating. Then… there’s the guilt associated with deep-frying.
Air-frying the blooming onion is quick, easy and comes with a lot less guilt. Use an aluminum foil sling (a piece of aluminum foil about 18 to 20 inches long, folded into a strip about 3-inches wide) under the dredged blooming onion to get the onion into and out of the air fryer. Be generous when you spritz the onion with oil. Remember, you’re not submerging the onion in deep-frying oil but it does need some oil in order to brown and crisp properly.
Blooming Onion Sauce
While the onion is air-frying, you have time to whisk together the ingredients for the sauce or dip. It’s very easy and straightforward and you probably have all the ingredients in your kitchen right now – mayonnaise, ketchup, Worcestershire sauce, onion powder, paprika and a little cayenne. Then all that is left to do is serve it to your guests who will undoubtedly be very impressed.
But wait… There are Mini Blooming Onions Too!
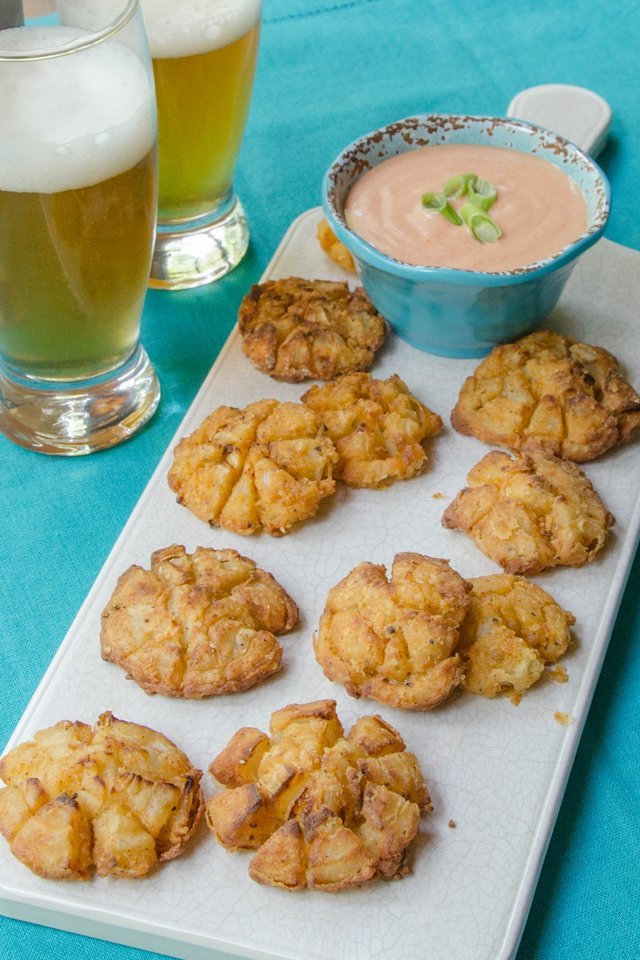
If a whole blooming onion feels like too much for you (or your guests), why not try Bite-Sized Blooming Onions? They are a little easier to make and feed more grabbing hands!


I LIKE EVERYTHING YOU MAKE.
Great recipes for onions. Just delicious !
I have and air fyer and iwas wonder ing how to it in the airfryer now i know thankyou.
Sincerely Tina Mcelroy
Haven’t made it yet but it’s now in the bin. Thanks!!!!!
This looks amazing! Thank you for such a wonderful recipe
Looks awesome. Havent used air fryer yet. This makes our first recipe. Thanks much
I epicly failed this! It looked beautiful going into the air frier. Came out with the outside outside ones burnt, some with no breading, some with raw breading. Maybe it needed to bloom more? If you have any suggestions, please let me know!! The sauce was on point. I used minced garlic.
Hi Tasha. First of all, good for you for trying! This is not the easiest of my recipes and it can be quite messy to make. It’s tricky, but you have to make sure you coat every nook and cranny with flour, then egg and then the flour again. The onion is not going to open up more in the air fryer, so make sure you are making the slices deep enough for it to open wide. Sometimes I remove some of the vey center “petals” so that the hot air can get everywhere. Then, make sure you coat all the flour with a good spray of oil. Glad the sauce was good. Give it another try!
ML
I made an onion but it came out with flour still on it and a little gooey in center also some flour would not stick on some of petals now I did not preheat the air fryer did that have something to do with it?
Hi Barbara. It’s a bit tricky and messy, but what you need to do is separate the petals as much as you can with your fingers and make sure all the flour is sprayed with oil. In order to get everything coated properly, you really need to make sure everything gets floured, egged and floured again. Don’t worry if some petals fall out. In fact, sometimes I remove a few of the petals from the very center to make sure everything gets the hot air needed to cook properly. Not pre-heating the air fryer is not a problem – it just might mean you need to add a couple minutes at the end.
Just made the blooming onion for the big game. Delicious and the dipping sauce is yummy with a nice little kick of spice. Thank you for the great recipe.
It tasted good but I need to get the flour more on the outside of the onion. You gotta remember this is air fried not deep fried. I’ll definitely make it again.
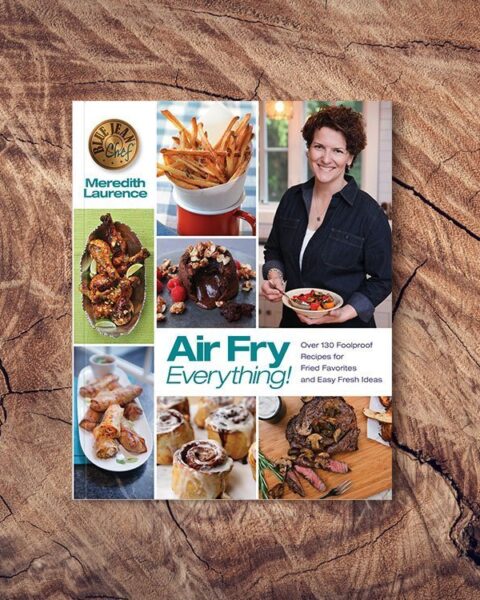
I wish you were around when I was a new bride. The only cooking host was Julia Child, who made me feel like a doofus who could not do what she did. You make people feel good about cooking. I love your videos and bought two of your cookbooks. I just bought an air fryer and will probably be buying “Air Fry Everything” to help me use it. Thanks so much for freely sharing your awesome cooking and teaching skills!!!! I’m going to this dish tomorrow night. I know it will be good because your recipes ALWAYS work.
I loved how super easy this was to make
I don’t have an Air Fryer. Can I do this in the oven and if so for how long and what temp. Thanks!
Hi haven’t tried this in a conventional oven, Marilynn. You might be able to do it if you have a convection oven and can put the onion on a rack on a baking sheet. If you have a convection oven and want to give it a try, I suggest 350ºF for about 30 to 40 minutes.
I made this last year from your recipe and it was delicious. Waiting for my onion farm in Valdaia GA. to ship, last of April, to make it again. and I love the dipping sauce. Thanks Meredith.
REALLY, REALLY YUMMY!!! I made this a few years back when I purchased my air fryer. It really is delicious and so is the sauce
I love everything you cook meridith aka blue Jean chef. You’re a excellent chef.
Haven’t made it yet, but I know that it will be amazing, as with all of your recipes that I have collected. Because the Blooming Onion is so delicate, I’m wondering if a foil sling might help keep the cooked onion from falling apart while removing it from the air-fryer basket?
Yes – an aluminum foil sling will definitely help remove the onion from the air fryer.
Made this little treat before dinner and both hubby & I liked it pretty much. If you follow the recipe exactly, you will not fail. Just takes a little work in the kitchen. I did have quite a bit of the sauce left over and I was wondering what I could use it for in the next few days instead of throwing away. Was thinking maybe french fries or? Thanks Meredith. I enjoy your giving us so many great recipes to try in our mail box.
Looks great pn paper and in the picture…in reality…its a complete failure. Flour remained pasty, did not bloom out, Not sure what went wrong!!!
Guy. Sorry you had trouble with the recipe. It’s not the easiest recipe to make. The onion will only bloom if you cut it as close to the root as possible. It’s a bit tricky because the closer you cut to the root, the harder it is to handle and coat with flour, but the more the petals expand. If the flour remains pasty, it is because you might not have shaken off enough excess flour and then sprayed the onion generously with oil. This recipe does take a lot of patience in the air fryer. Hopefully, you might try it again.
Made the Blooming Onion tonight. We loved it. Will try the smaller ones next. You’re recipes all look so good that we decided we have to try more of them. Thanks.
I madre this yesterday and it came out delicious. Thank you.
Can I use a deep fryer?
Sure, you can use a deep fryer! Go for it!
Will other onions work with this recipe?
You could use any large onion for this recipe, but Vidalia onions are wider and flatter and work better when you cut the petals into the onion. Plus the sweet taste of the Vidalia onions works well with this recipe.
ML
Can you make the blooming onion ahead of time and put in fridge?
I would not advise making it ahead of time and storing it. It really is best to eat this right after air frying. The coating will get soggy if held in the refrigerator.
Have the air dry option in my new oven. Would it work the same?
Hi Barb. You could try the air fry option of your oven. Place the onion on a rack over a cookie sheet and remember to spray generously with oil so that there’s no dry flour exposed. You might have to extend the time a little depending on the size of your oven.
Onion was fine, but the dipping sauce was not good. Way too much ketchup, I’d only add maybe a tablespoon or two.
Great you liked the Blooming Onion and can adjust the sauce to your liking next time.
it was so good
LOOKS AWESOME, WE GOT A NEW STOVE IT IS A LG ELECTRIC RANGE IT HAS A AIR FRY MODE CAN I USE IT FOR YOUR RECIPES ?
Hi there. The difference between an air fryer and an oven with an air fryer mode is the placement of the fan in relation to the heating element. In most air fryers, the fan is right behind the element, so it really forces hot air directly at the food. In most ovens, the elements are on the top and bottom of the oven and the fan is on the side or back of the oven. (Check this on your new LG range) So, while the fan blows the hot air around, it is not quite as intense. Also, the oven cavity is much bigger than an air fryer, so again it is less direct. That said, you can use air fryer recipes in your oven with the air fryer mode, but you might need to add a minute or two. Try to put the food on a rack that is over a baking sheet to replicate the air fryer basket (which is either perforated or made of a mesh).
Hello. Where can i find the oil spray you used. Thank
.
Hi Evelin, here is the link for the info about the product on my website: https://bluejeanchef.com/product/oil-sprayer-bottle/ .
How about putting it on a cookie sheet and baking it in the oven after all that preparation, on 35OF for 25-30 min?
If you have a convection oven, you could try baking the onion in the oven (on a rack on a cookie sheet), but the force of the air blowing around in an air fryer is really what helps to brown and crisp up the batter on the outside of this onion.
This looks great but I can’t do dairy, would this work with oat milk? Or maybe just eggs?
Hi Rachel. I think you could use any milk alternative mixed with the eggs for this recipe.
I made this recipe tonight and it went horribly awesome! Let me explain.
I followed the recipe exactly. I took my time getting the flour mixture, then egg, then flour mixture again, in between every petal. (After reading your responses in the reviews). I set the machine at 350 for 25 and hit play. With around 13 minutes left I checked on it and it looked horrible. That’s when it hit me. I FORGOT THE OIL!!! We are new to air frying and this was the first real thing that I tried to make. Everything prior was warming things up or just simple potatoes, grilled cheese etc. I was so mad and was about to throw it away, but my wife convinced me to give it a good spray and put it back in. I did and about 5 minutes later I checked on it again and it was clearly in recovery. I gave it another light spray and gave it a few more minutes.
It wasn’t the prettiest thing ever but it was delicious. I ate the entire thing myself. There were a few places deep on the inside where the flour was still visible, but I still ate it. The dip recipe was awesome as well, but it didn’t even need it. It had the perfect combination of spice and flavor. Thank you so much! I will definitely be making these again…. and NOT forgetting the oil!
Good for you for trouble-shooting, Josh! This recipe does take some patience – cutting the onion is one thing and coating it properly is messy. Glad it worked out in the end!
This looks amazing! I am looking forward to trying this recipe; I am sure my family will love it!
Have you experimented with different varieties of onions? Would you recommend Vidalia onions?
Love your photos and your photos are super helpful!
Hi Margaret. The recipe does call for Vidalia onions. I like the sweetness of the onion and the flatter shape helps make the “flower” shape of the blooming onion. You really could use any type of onion for this recipe. You could also try making Bite-Sized Blooming Onions with Cipollini onions too! https://bluejeanchef.com/recipes/bite-sized-bloomin-onions/
Anxious to purchase a air fryer and try~ Your cook books are fantastic!
Made one with a brown onion. It was ok but I think the flour needed to be soaked in oil because there were lots of dry flowery petals. I also cut back of the time because the onion was fairly small and was burning on the edges.
The onions do need to be generously sprayed or spritzed with oil. You can also spritz a little additional oil on the dry spots during the air-frying process for even browning.
Looks so good and I love onions.
Would almond flour work in this recipe instead of regular flour?
This recipe has not been tested with any alternative flours, but almond flour or a combination of almond and coconut flours should work. It will alter the taste of the finished product, but if you like other coated foods with alternative flours then you should like the end result. Let us know if you give it a try!
Love this
Going to cook it today
I made the blooming onion it was fantastic.It was my first time I will make it again,We used honey mustard salad dressing for the dip very good.
My blooming onion was a floured burnt mess. I will not waste my time again
Sorry you had an issue with the recipe. If it comes out with too much flour, it helps to spritz with oil several times during the cooking process. If it starts to brown too much before the onion is soft you can lower the heat of your air fryer a little.
I love to eating air fryer blooming onion. Your content was so awesome. When I read this content I can easily understood how to make it in my home. Thank you for your idea.
I’m new to Air Frying & still eagerly learning. Thank you for your recipe. After researching, I found your recipe & tried it last night. What a success !! My husband loved it. It came out perfectly. Your instructions are very easy to follow. I’ll be looking for more of your recipes from now on.
This recipe failed.. I did everything like your instructions said but the egg mixture was too thin and it would not bind to the flour.. ended up with burnt ends on the onion..
Sorry you had an issue with the recipe. The mixture of 2 large eggs and 1/2 cup of milk will be a thin batter. You have to coat the onion in flour, then soak it in the egg mixture and then coat it in flour again. You can sprinkle some of the flour in between the “petals” to cover the onion. You need to generously spritz with oil before air frying. All air fryers are different as well as the size of all onions. If the heating element is close to the onion, the tips could get too browned on the ends. You can lower the temperature and cook it a little longer if the ends are getting browned before the onion is cooked through.
I have an Air Fryer Oven will it still work?
Yes you can use any type of air fryer for the recipe. The timing may need a little adjusting so just keep your eye on it during the air-frying process and make sure you spritz it with additional oil if needed.