What does Trussing a Chicken Mean and Why do it?
Trussing means to tie a chicken with kitchen twine keeping the wings and legs of the bird close to the body. Traditionally, chefs trussed chickens before roasting them to keep the chicken in a presentable shape and to help them cook more evenly. When you plan on cooking the chicken on a spinning rotisserie, however, trussing is even more important. In rotisserie cooking, it is critical that the legs and wings of the chicken stay close to the body so that they don’t hit the heating elements or get stuck on anything. Trussing keeps the chicken compact so that it spins easily in your oven as well as cooks evenly. It is the only tricky part of making a rotisserie chicken, so let’s learn how. The images below will walk you through the three steps of tying up the chicken or, if you prefer, you can scroll to the video at the end.
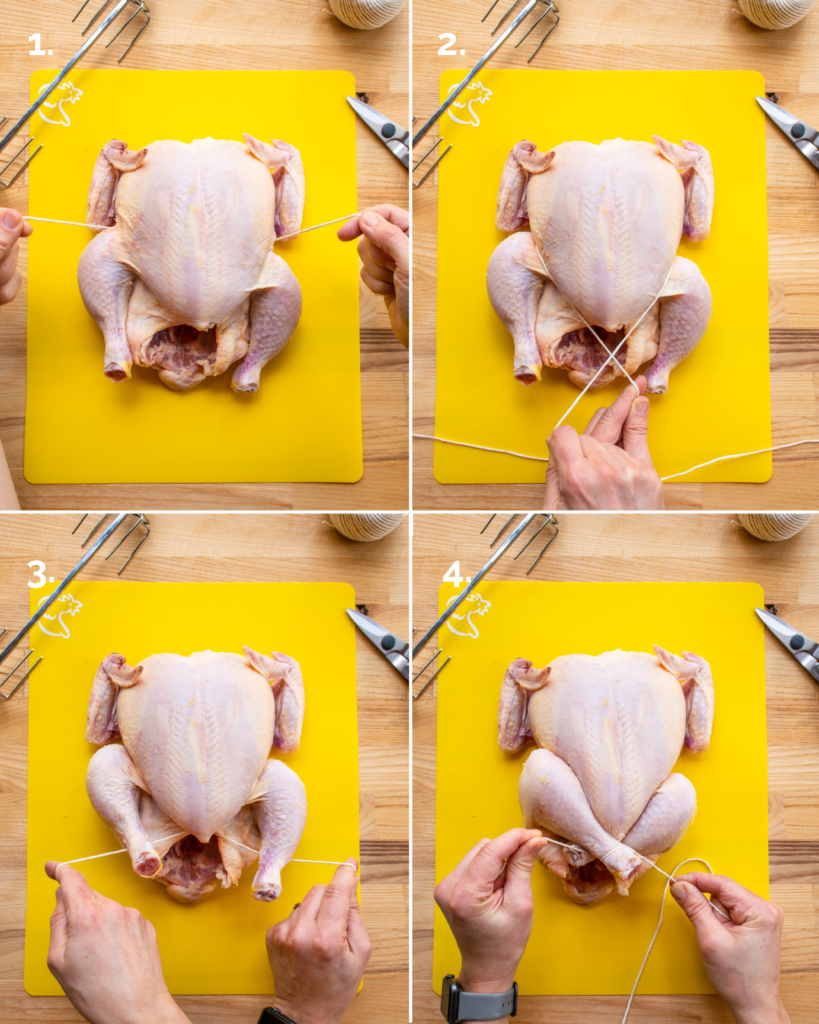
Step 1: Securing the Legs
The first step is to secure the legs together. The images above walk you through these steps:
- Start with 4 lengths of kitchen twine – that’s twine that spans the neck to the tail four times.
- Place the chicken with the legs facing you.
- Start with the twine underneath the back of the chicken midway between the head and the tail.
- Bring the twine down between the legs and the breast and then cross the string under the crown of the chicken (the bottom of the ribcage).
- Twist the twine around each of the legs and bring the legs together.
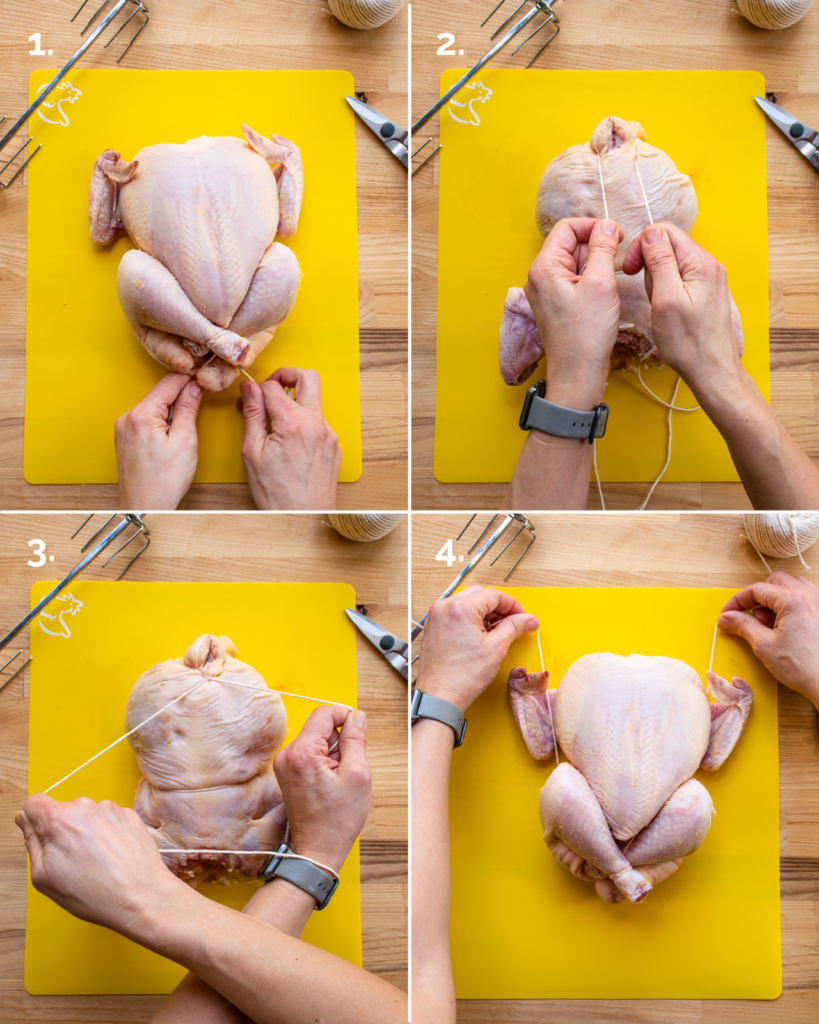
Step 2: Securing the Tail
Next, we’ll secure the legs to the tail to keep them tight and in place.
- Bring the twine down on either side of the tail.
- Flip the chicken over so that it is resting on its breast.
- Cross the twine around the tail and pull taught.
- Wrap the twine around itself twice (rather than tying a knot) and flip the chicken back over onto its back.
- Bring the twine up on either side of the chicken over the wings.
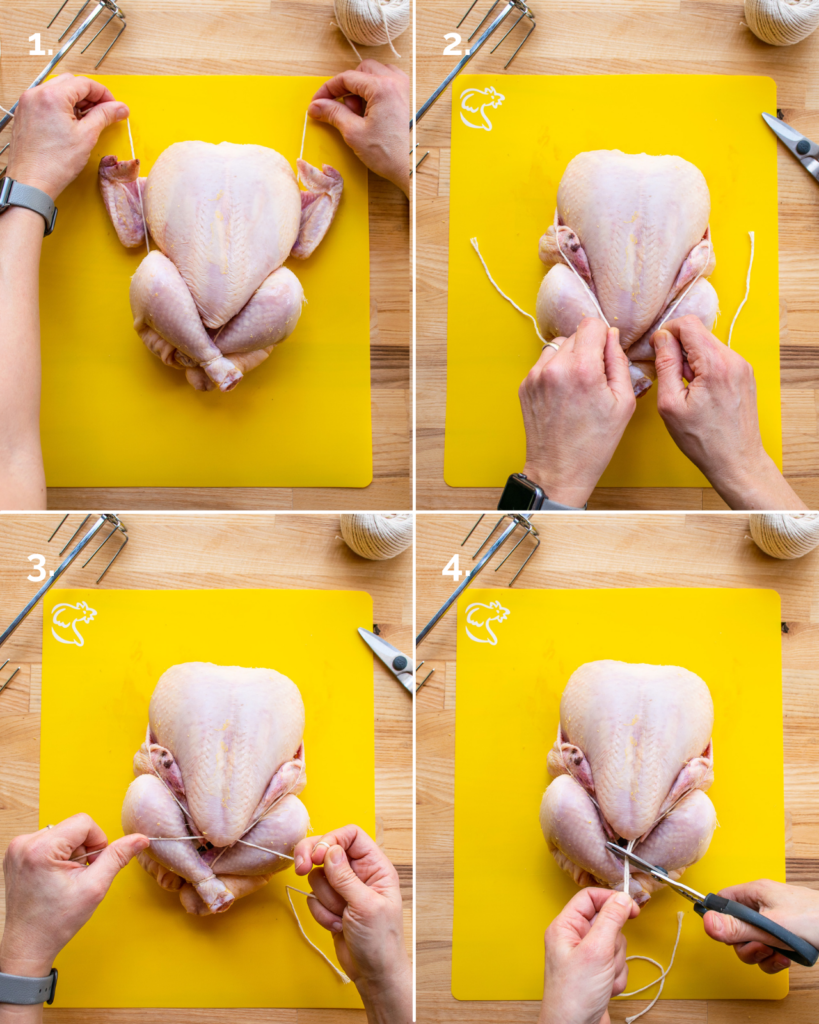
Step 3: Securing the Wings
With the legs and tail secured, all we have left to do is to secure the wings, tucking them as close to the body as possible. The goal here is to tuck the wing tips down between the thighs and the breast so that they don’t rest right on the breast. That allows for the breast to brown evenly without being blocked by the wings.
- Once the twine is resting over the outstretched wing, bring it out and back down towards the leg. Doing this should wrap the twine around the wings.
- Tuck the wing tips into the space between the thigh and the breast and cross the twine underneath the crown of the chicken (the pointed bottom of the ribcage).
- Tie the twine in a knot securely under the crown.
- Trim off any leftover twine.
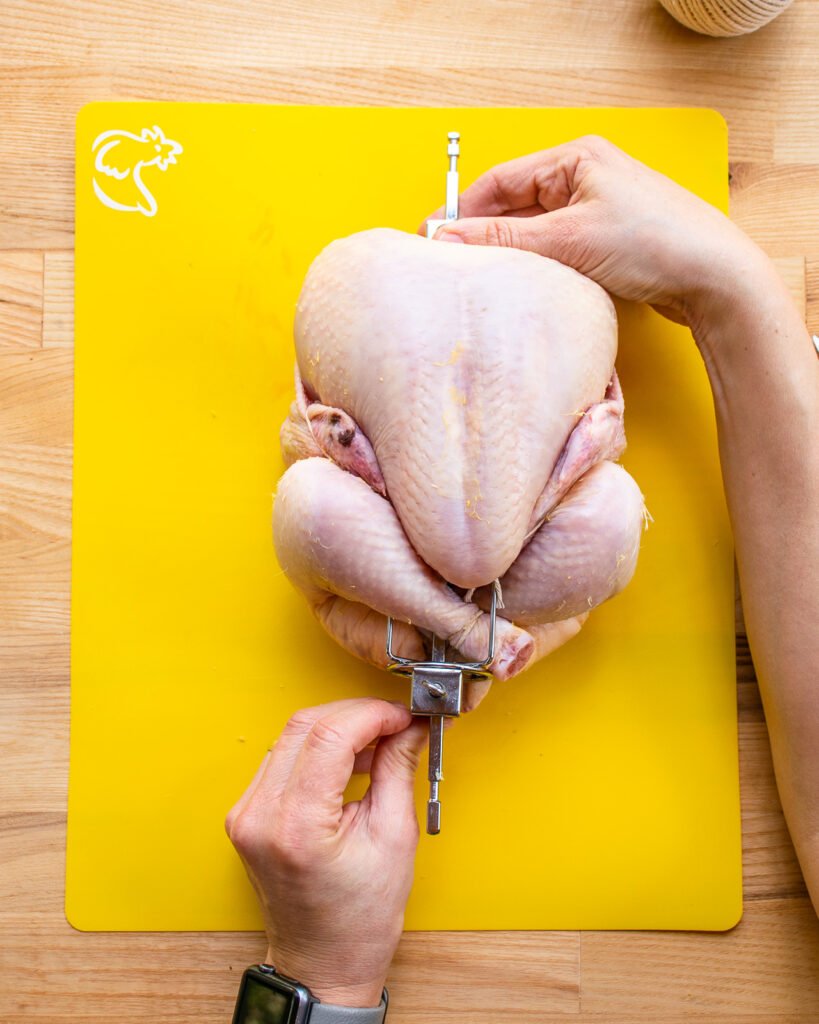
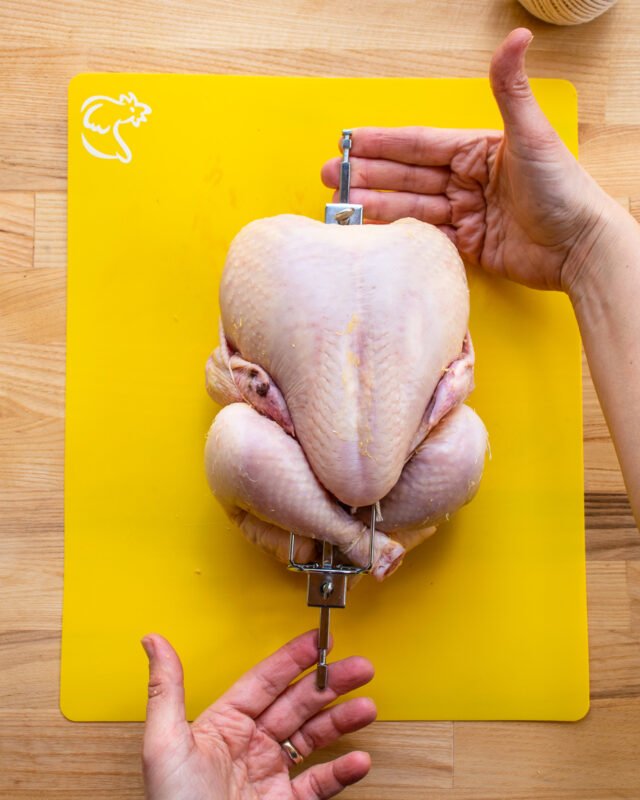
Step 4: Placing the Chicken on the Spit
All you have left to do is to put the chicken on the rotisserie spit. Start with the tines secured to one end of the spit. Slide the spit down from the neck to the legs and make sure the other end of the spit comes through the space between the legs and the tail. Add the second set of rotisserie tines to the spit, inserting the spikes into the base of the chicken.
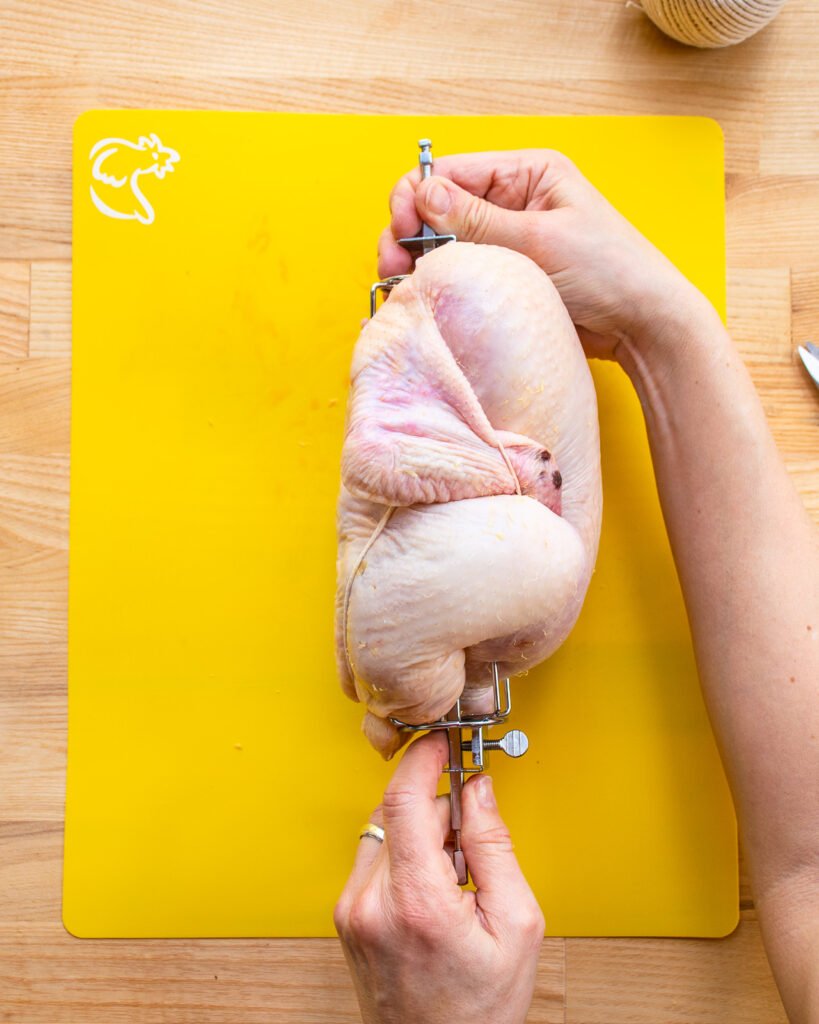
Ready to Rotisserie
Make sure the chicken is resting in the middle of the spit and that the chicken is centered front to back as well as top to bottom. Tighten the rotisserie screws and you’re ready to season and rotisserie roast your chicken. You can season the chicken with simply salt and pepper, or you might want to add some dried herbs or my favorite spice rub. Follow your rotisserie oven instructions for how to operate the rotisserie and for suggested cooking temperatures and times and get ready for a delicious, juicy and well presented dinner!


In the article “The images below will walk you through the three steps of tying up the chicken or, if you prefer, you can scroll to the video at the end.”
Where is the video, please?
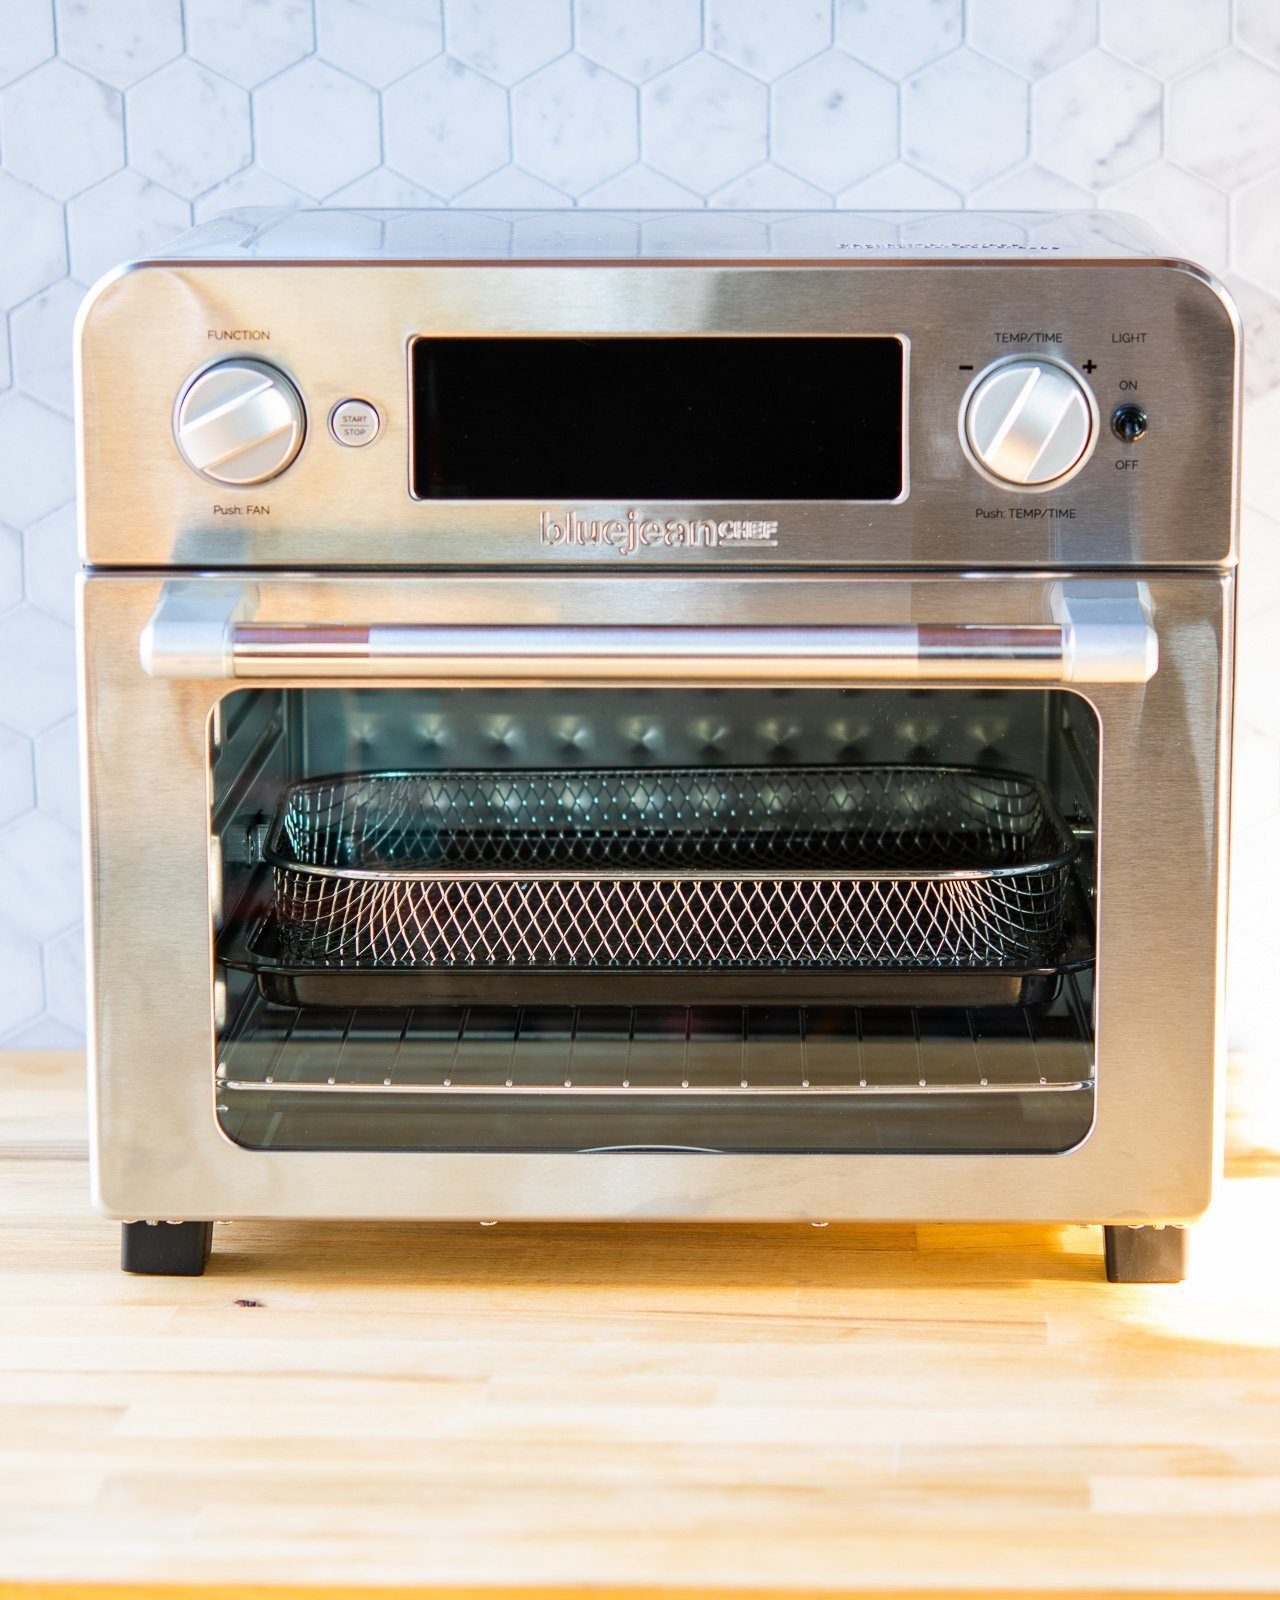
IF you scroll down towards the bottom of the page, you will see a heading “How to Truss a Chicken.” Under that is a box with a picture of a chicken in the rotisserie oven with a rectangle with an arrow in it. Click on the arrow and the video will play.
What if the string burns?
It should not burn. There are not open flames in the rotisserie oven.