Why Make Homemade Ice Cream?
There are plenty of answers to this question. The first will be obvious when you taste this homemade strawberry ice cream. It’s delicious in a bright, fresh and simple ingredients kind of way. There are only a few ingredients in homemade ice cream and that’s something you can feel good about. Making your own ice cream is also fun, even with (or maybe because) an ice cream maker doing all the heavy lifting… or constant stirring. Plus, you can customize your flavors when you make it yourself and end up with something you’ve never had before, or can get anywhere else. So, with that answered, let’s get started!

The Tools You Will Need
This ice cream recipe does call for an ice cream maker. It can be any style of machine, from the simple hand cranked version I grew up with, to an electric ice cream maker with a bowl that you pre-freeze, to the more expensive compressor-style machines. If you don’t want to spend the high price, but still want the convenience of not having to pre-freeze a bowl for 24 hours ahead of time AND being able to make batch after batch of ice cream, then a thermo-electric ice cream maker might be for you. Whichever type of machine you have, just follow your ice cream maker’s directions for how to churn the ice cream when the time comes. You’ll also want a container to store your finished ice cream and a great ice cream scoop.
Simple Pure Ingredients
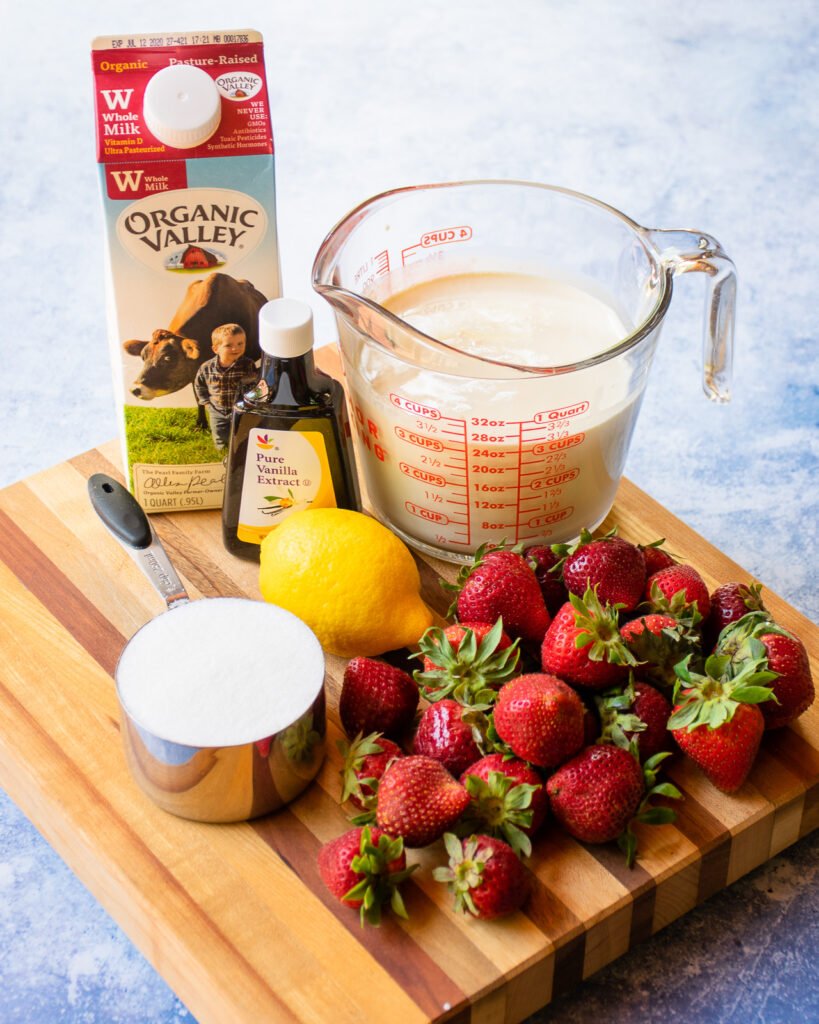
The photo above is a pretty sight to any home cook – just a few, easy-to-find ingredients. That’s all you need to make this homemade strawberry ice cream – cream, milk, vanilla extract, a lemon, some sugar and strawberries, or any type of berry or fruit that you like.
Eggless Ice Cream
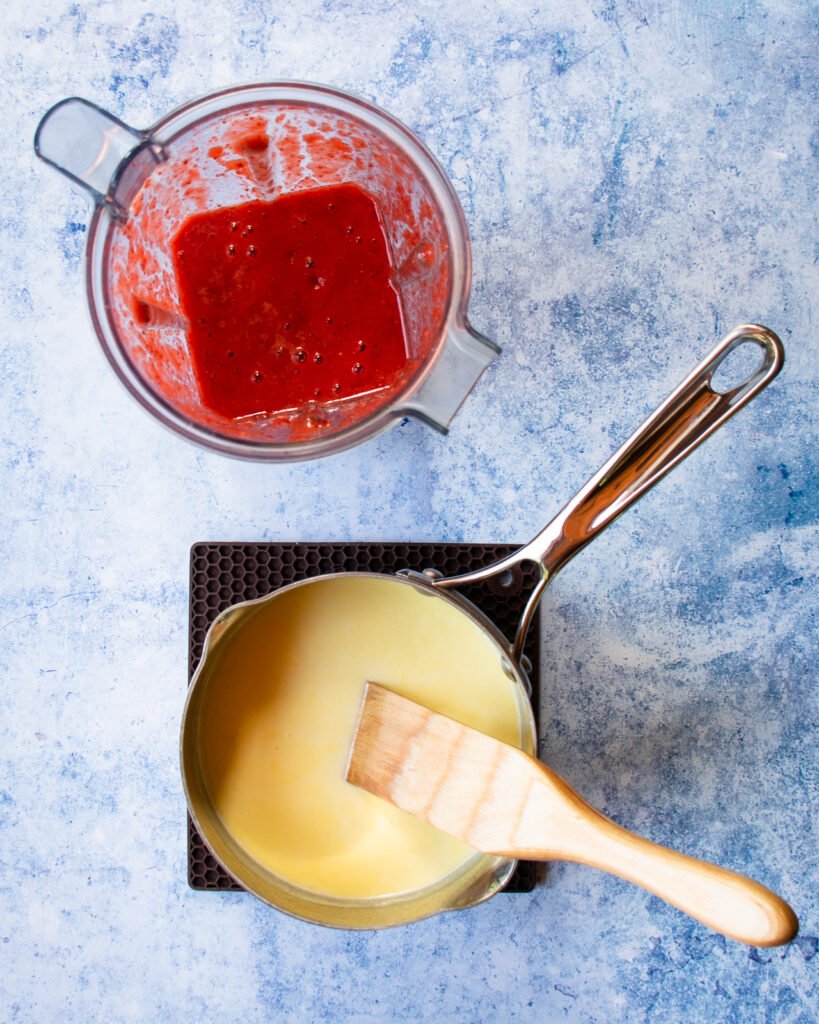
There are two main styles of ice cream – French-style and Philadelphia-style, and what separates the two are eggs. French-style ice cream uses a custard base that is made by heating cream and sugar together, tempering in eggs and then cooking until the mixture thickens. While this does make a delicious ice cream, it can be super rich and making the custard is off-putting to some home cooks. Philadelphia-style ice cream is much easier to make. There’s no custard, no eggs, no tempering, no thickening. All you have to do is heat the cream and milk just enough to dissolve the sugar as you stir. Then, add the flavoring ingredients (like the berry purée and vanilla) and churn according to your ice cream manufacturer’s instructions. That’s easy. The result is a little less creamy than French-style, but that just means you can eat more of it!
Start with a Cold Base
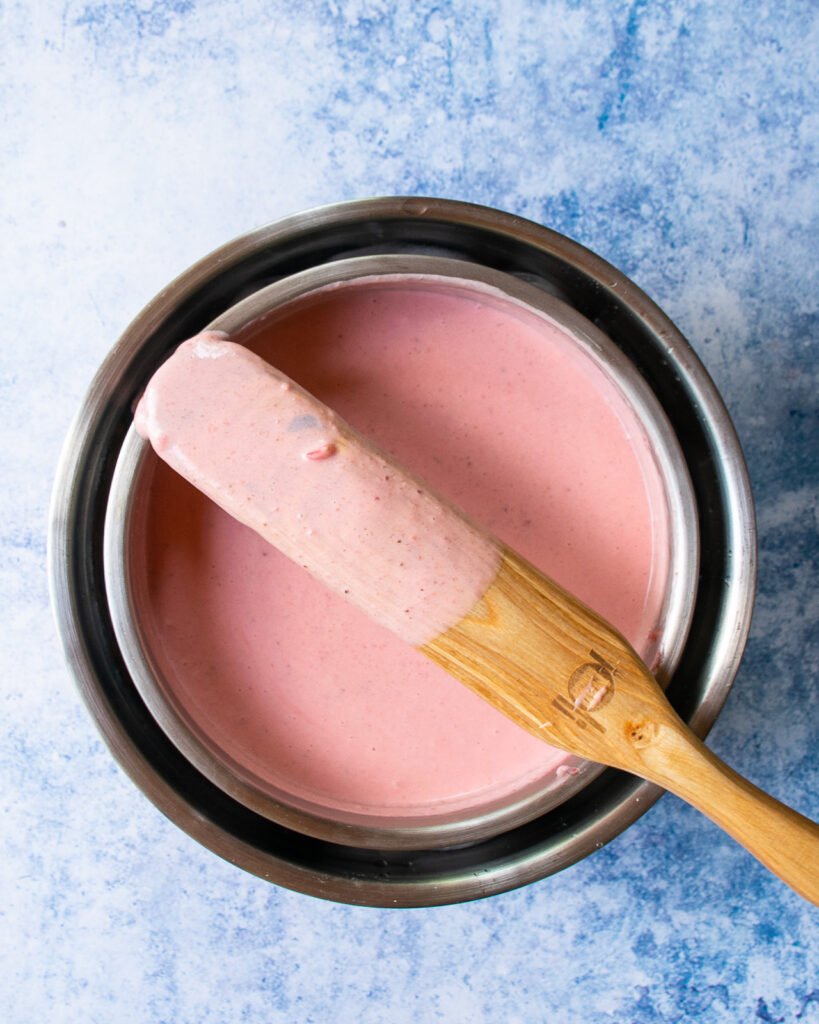
The most important tip when using an ice cream maker is to start with a cold base. That does require a little planning. Ideally, you want to make the base for the ice cream several hours ahead of time, but you can chill the base relatively quickly by using an ice bath – fill a large bowl with ice water and then place a smaller bowl with the ice cream base inside the larger bowl, surrounded by the ice water. Use a spoon to stir it regularly and it will cool down in no time. The cooler the base, the faster it will churn into ice cream, so don’t skip the cooling stage.
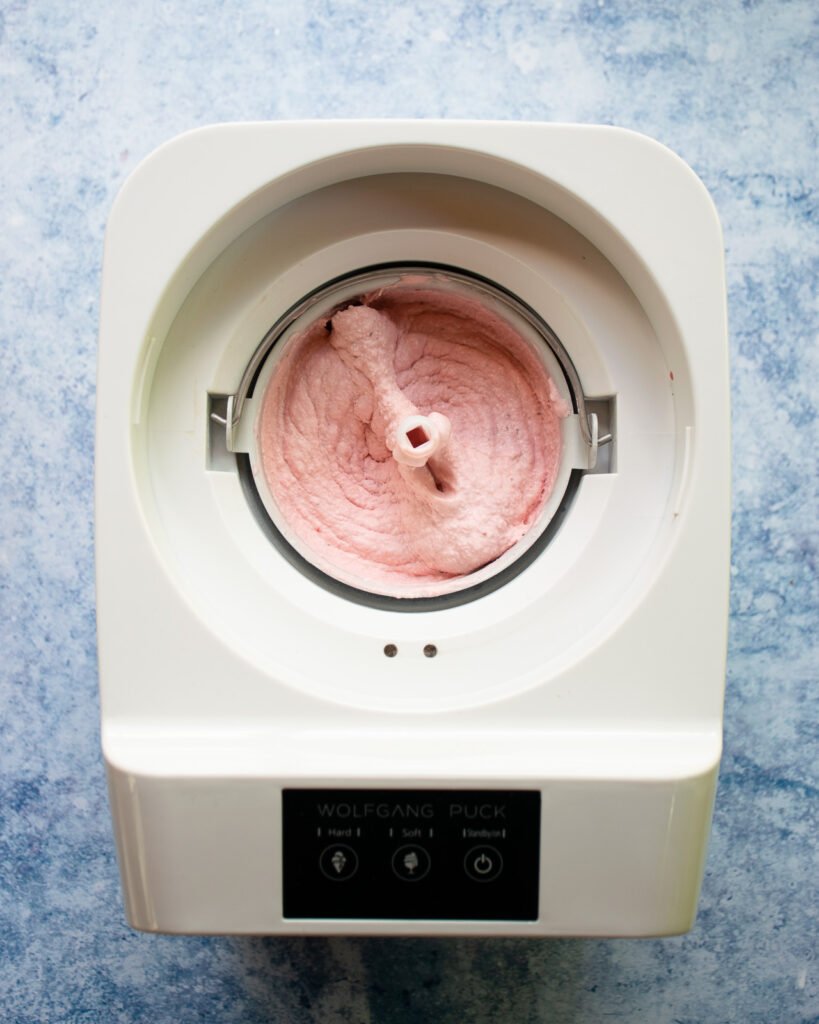
Soft vs. Hard Ice Cream
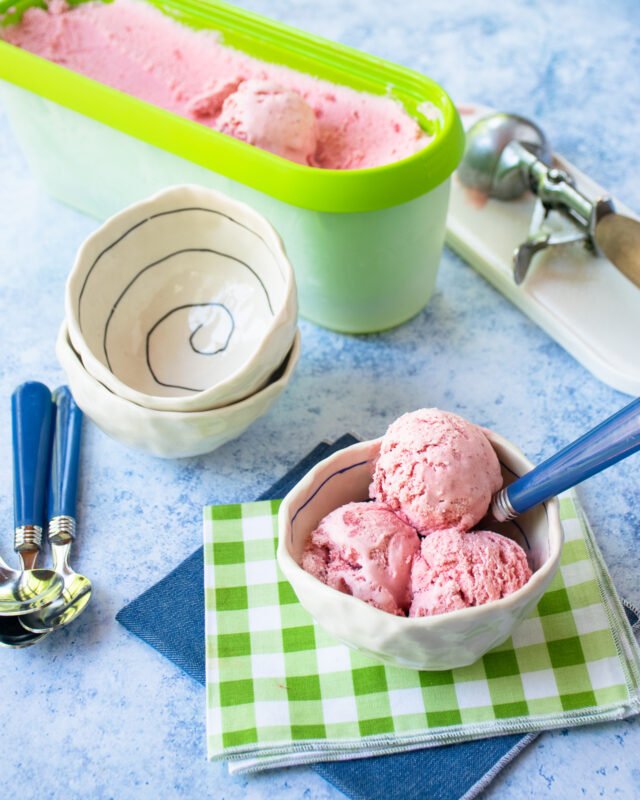
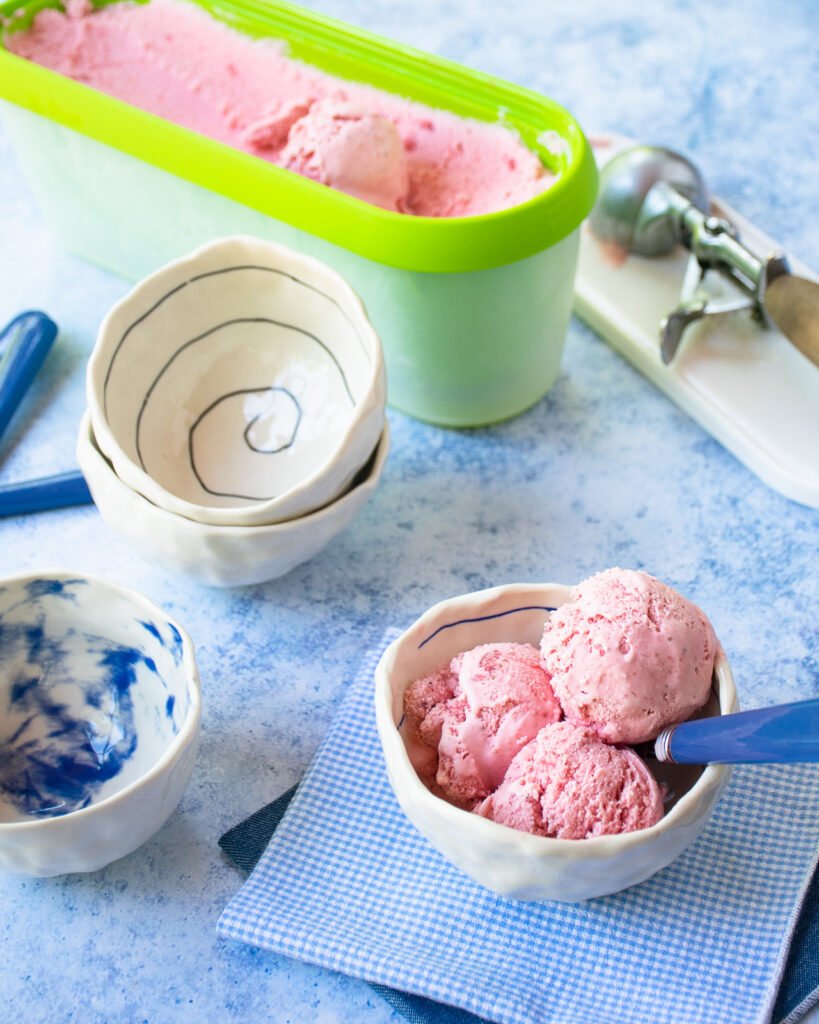
There are many ice cream makers out there that claim to make ice creams of two different textures – soft and hard. This isn’t exactly true… or possible. All ice cream makers end up with ice cream that is soft serve. There comes a point in churning that the ice cream becomes too thick and heavy for the paddles of an ice cream maker to turn. That stage comes way before the ice cream could be considered “hard”. So, regardless of what ice cream maker you’re using, you should expect to have soft serve ice cream unless you freeze the ice cream after it has finished churning. That’s why it’s a great idea to have a container ready for that ice cream. In fact, I keep my ice cream container in the freezer until I’m ready to use it so that it’s super cold when that ice cream goes in, helping it to get to that “hard” stage sooner.
How Long Will it Last?
This is a personal question. For no-one I know, ice cream will last 2 to 4 weeks in the freezer in a well-sealed container. For me, give me a couple hours.


I love all your ideas for flavors of ice cream but I cheat with 2 ingredient ice cream and no ice cream maker needed.
I do not have an ice cream maker. Where did you get your recipes for those recipes (no ice cream maker).
Hi Linda. You can make ice cream without an ice cream maker – freeze for 20 to 30 minutes in a shallow pan, then beat the ice cream, freeze again for 20 to 30 minutes, beat again, repeat. The final result won’t be as smooth as if you were to use an ice cream maker, but it does work. Here’s more information: https://www.tasteofhome.com/article/how-to-make-ice-cream-without-an-ice-cream-maker/
Hello,
Would fresh peaches work with this recipe and if so what modifications would be necessary?
Thank you,
Elizabeth
Hi Elizabeth. I do have a recipe for Peach Ice Cream on my website that you could check out: https://bluejeanchef.com/recipes/peach-ice-cream-with-waffles/
So after I cool overnight I don’t have to churn it in the ice cream machine?
No you still have to churn the mixture in the machine to turn it into ice cream. The mixture is chilled so it cools completely which helps the churning process because the ice cream machine will stay colder.
Would frozen strawberries work?
Yes – frozen strawberries should be fine.
i am definitely trying this .. I am assuming the ice maker that attaches to my kitchen aide will do the trick.
We made your Strawberry ice cream today with our new BJC ice cream maker. Yummy. The hardest part was waiting for the ice cream to harden!!
My son and I enjoy making homemade ice cream as well, what we did discover is that most ” heavy cream ” has additives like guar gum. Pure heavy cream is a bit harder to find, but it is out there.
Heavy cream with and without additives will work, but it is best if you can use heavy cream without any additives.