Braising is such a simple and satisfying cooking method. All the work is done up front – you brown the meat (or vegetables) first, add the liquid, cover the pot and then let time and temperature do the rest of the work, ending up with a delicious and tender meal. This cooking method is perfect for tough, cheaper cuts of meat which usually have more flavor than their tender counterparts. By braising these cuts of meat, you use time and temperature to turn them into tender pieces that you can cut with a fork. Although it is usually meats that are braised, vegetables can also be cooked with this cooking method, rendering them super flavorful as their natural sugars concentrate. The low temperatures and long cooking times also fill the house with fantastic aromas of whatever you happen to be cooking. There are some important points to consider when braising.
Choice of meat
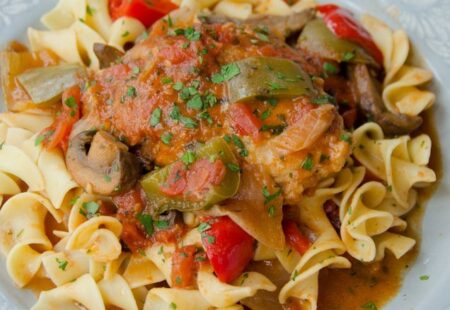
It makes more sense to braise tougher pieces of meat, although you are not restricted to that. Traditionally, a tough rooster might have been selected for chicken cacciatore. Today, roosters are hard to come by (ya’ think?), but you can certainly select a tougher, larger chicken for this recipe. If you’re braising beef, good cuts to choose are: top blade roast, chuck roast, seven bone roast, shanks, short ribs, brisket and ribs.
Braising liquid
The meat that you are braising should be partially covered in liquid, but not submerged. This liquid will eventually become a sauce for the meat, so make sure it is full of flavor. It will take flavor from the meat you are cooking, but it should also provide flavor of its own. Liquids often used to braise foods are: wine, beer, stocks, fruit juices, tomatoes.
Braising requires a low temperature
A low temperature is important because the goal of braising is to break tough collagen into silky smooth gelatin, which happens at 140˚F. If you use too high a heat to braise, the exterior of the meat will dry out before the inside of the meat has time to reach this critical temperature.
Braising takes time
Believe it or not, you can end up with dry meat when you’re braising if you don’t cook it for long enough. While the collagen is breaking down into gelatin, the muscle fibers of the meat contract and squeeze out moisture. This flavors the sauce, but it dries out the meat. After time, however, the muscle fibers relax and re-absorb liquid. Don’t cut the braising time short.
Other ingredients
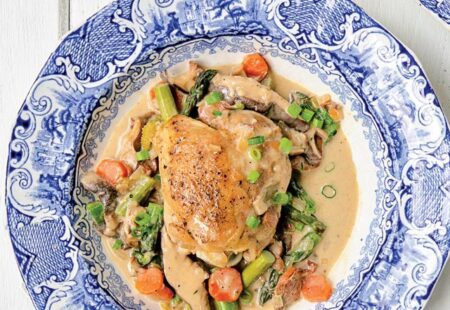
Vegetables often make up part of a braised meat dish. Vegetables, however, cook much faster than meats so add them closer to the end of the cooking time so they don’t turn to mush. Sometimes, it is nice to cook the vegetables separately to seal in their flavor and then add them to the braised dish at the very end.
Thicken the sauce at the end of cooking
As mentioned above, the braising liquid will become the sauce for the finished dish. If the braising liquid is not tasty enough, let the meat rest and simmer the liquid to reduce the sauce. The flavors will concentrate, and the consistency of the liquid will become more sauce-like.
Equipment
Traditionally, a Dutch oven was the pot used for braising. A Dutch oven was originally a cast iron cooking pot with thick walls and a tight-fitting lid. The Dutch were historically very good at making cast iron pots, and exported these pots to England and beyond. Early cooks found them incredibly useful and versatile and referred to them as Dutch ovens. Indeed, they loved their cast iron Dutch ovens so much there are actually records of the pots being passed down through generations and left to children in wills. Dutch ovens could be put directly in a fire and used as an oven or as braising vessels. Some versions had with feet on them to raise the pot up above the coals. Many countries make cast iron today, and have renamed their Dutch ovens. You’ll see references to French ovens, braisers, cocottes or casserole pans. All of these pans perform the same function.
A cast iron Dutch oven has all the qualities of a good pot for braising. It has thick walls in order to retain and conduct the heat evenly over a long period of time. Pot roasts should cook on low heat for a long time. Cast iron is an efficient medium for this type of cooking.
A good braising pot must also have a tight-fitting lid. The lid must trap the steam from the liquid because that steam cooks the meat not submerged in liquid. If the pot you are using does not have a tight-fitting lid, cover the pot with aluminum foil first and then place the lid on top.
It is also important for the pot to be stovetop safe. The flavor of a pot roast is enhanced if the meat is browned first before adding the liquid to braise. While it is possible to brown the meat in one pan and then transfer all the ingredients to an oven-safe casserole, it creates more pots to clean and you lose the flavors from the browning pot.
Finally, the pot must also be oven-safe. Braising can be done on the stovetop, but it is easier to maintain the low temperature in a 300˚F to 325˚F oven.
Armed with the right pot and the knowledge of braising – the choice of meat, the braising liquid, the temperature and time required – you have everything you need to make a great pot roast.
Quick Notes:
- Choose your meat carefully, selecting tough cuts like top blade roast, chuck roast, seven bone roast, shanks, short ribs, brisket and ribs.
- Use a flavorful braising liquid like wine, beer, stocks, fruit juices and tomatoes.
- Keep the temperature low. Braising should be a low simmer on the stovetop or oven temperatures set to 300ºF – 325ºF.
- Don’t cut the braising time short. You need the long period of time for the collagen to break down into gelatin making the meat tender.
- Add ingredients at the right time. Vegetables take much less time to cook than meats, so add them partway through cooking. Alternatively, you can sauté vegetables and add them in at the end.
- To thicken sauces at the end, let the meat rest outside of the pot and simmer the sauce until it is the right consistency for you.
- Get the right pot for braising. It should be a heavy gauge pot with a tight-fitting lid that is both oven and stovetop safe.