To me, a perfect cheesecake should be moist and luscious but still be able to hold its shape when sliced and the one issue to avoid is a big crack or crevice in the top. Cracks in cheesecakes happen for a couple of reasons. The first is that air gets trapped in the batter, expands when the cheesecake is baked and needs to find a way out. It escapes from the cake by creating the massive gash in the top. You can avoid this by making sure you don’t incorporate too much air into the batter as you mix the ingredients together. This can be a challenge, however, because you also want to make sure that there are no lumps left in the batter. So, you need to find the fine line between just beating enough to create a creamy smooth batter, but not so much that air is incorporated. I use a food processor to mix my batter together because it’s quick and effective – the faster you can get the batter smooth, the less time there is to incorporate air. If you are using a stand mixer, use a lower speed which crushes and smooths the cream cheese, but doesn’t whip air in. The other trick is to add the eggs at the very end of the mixing because it’s the egg proteins that will hold air bubbles (think about how you are able to whip air into egg whites). So, once the eggs are added, beat the batter as little as possible. That means you need to make sure there are no lumps in the cream cheese when you add the eggs.
The other way a crevice will form is if the temperature changes drastically and suddenly. This is very easy to avoid. Once the initial baking has happened, leave the cheesecake in the turned off pressure cooker for an hour while the temperature drops slowly. Then transfer it to the counter, but leave it wrapped up for another hour or so to come to room temperature. Then, and only then, wrap in plastic wrap and refrigerate for at least 8 hours. Remember to remove the cheesecake from the refrigerator for at least half an hour before serving though.
Making cheesecakes in the pressure cooker does save you a little time during the baking step (22 minutes instead of 60 minutes), but there’s another good reason to use a pressure cooker. They create an incredibly moist environment and bake the cheesecake at a lower temperature than if you were to do so in the oven (pressure cookers reach about 250ºF, whereas most people bake a cheesecake around 325ºF). Moisture is good for preventing any drying or cracking of the surface of the cake, and the lower temperature means less temperature change for the cake to have to go through. So, it’s a win-win!
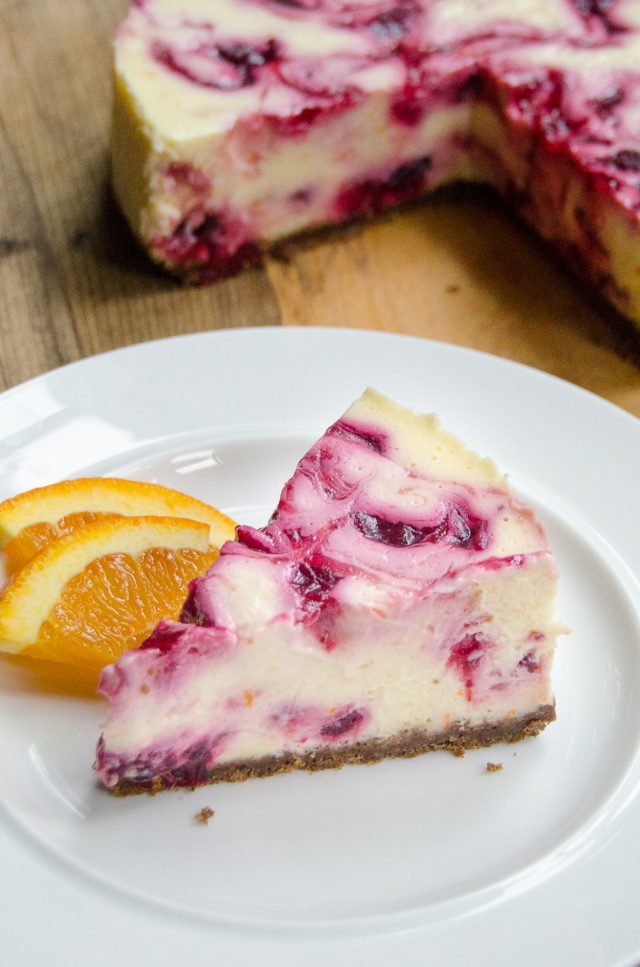
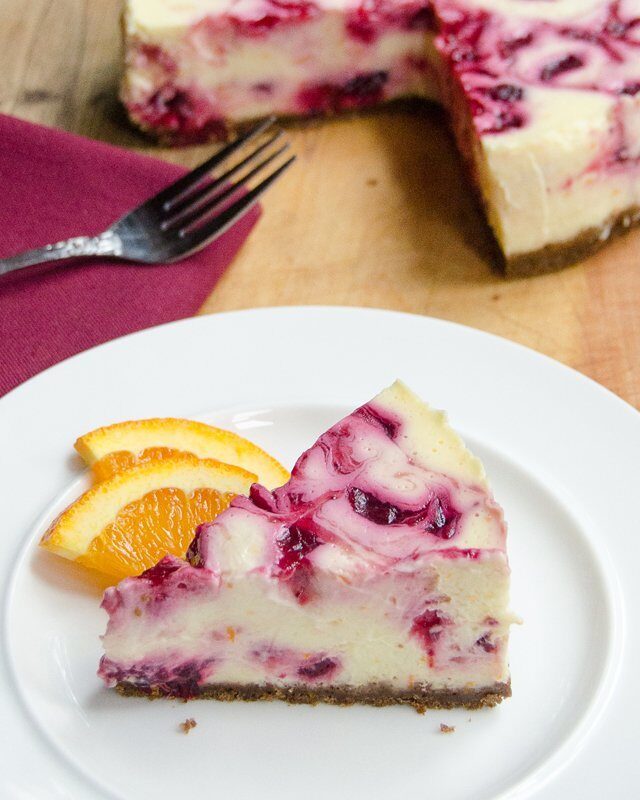
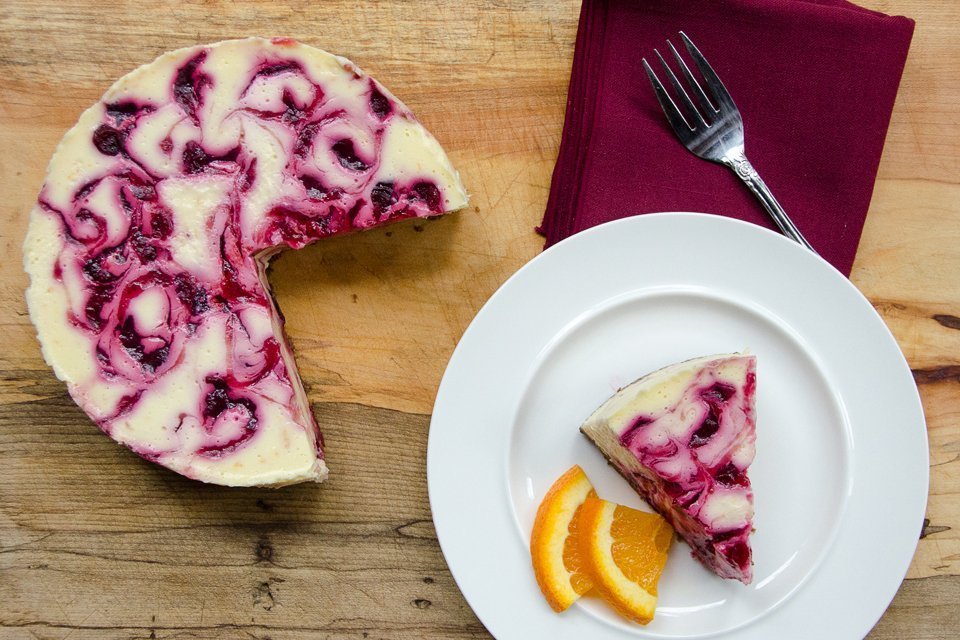
I love the flavors of this cranberry orange cheesecake for the holidays when you find cranberries everywhere in the grocery stores, but this cheesecake is very easy to modify into other flavors. Lemon Blueberry Cheesecake is perfect for the spring or summer, while Peanut Butter Cheesecake would probably make you really happy any time of the year! If you’re interested in learning how to make a cheesecake in the oven, click here. Once you have the basic batter mixing technique down, you can even make individual strawberry cheesecakes using your sous vide circulator.


My skinflint (Scots, Irish, German) heritage makes me ask: does this REALLY require unsalted butter ? I know that in BAKING, sometimes unsalted is chemically necessary; but here? (I am, for the most part, a low/no salt kinda guy (heart) who PREFERS the taste of salted butter to unsalted. There is not that much salt in 2 1/2 tablespoons of butter and I do not believe would have a negative taste effect.) Yes, unsalted butter would store in the refrigerator for a really long time and could always be considered an emergency back up to the salted. 🙂
I’m going to make this soon. I love making cheesecake in the pressure cooker, so easy.
I made this cheesecake and though it tastes really wonderful, it did not set up completely. I don’t know where I went wrong, but I will try again as I really like the
flavor.
Sounds like it could use just a little more time in your cooker. Different cookers do have different pressure levels, which could have caused the cheesecake to not set up completely. Also, make sure you do a natural pressure release so the cheesecake has even more time in the cooker.
Made this DELICIOUS cheesecake last year for Thanksgiving and my only regret was only making one! Making a few this year!
Instructions were easy to follow.
Used the base instructions to make a peanut butter chocolate cheesecake and a peppermint oreo one for christmas. So good!
I made this yesterday and it turned out fabulous! Can’t wait to try the blueberry one. I couldn’t have made this without the video–really appreciate them!
I have made this many times and it is consistently wonderful. I would like to make several, using 4″ pans. I assume that the cooking time would need to be adjusted but I am not sure how to calculate it. I would rather not use the trial and error method and waste the ingredients.
Hi Sherry. If you divide the batter between four 4-inch pans, I would pressure cook them for 13 minutes. If you divide it between 3 pans, the batter will be higher and I would pressure cook it for 20 minutes. Either way, use a natural release and allow the cheesecakes to cool in the pot for about 45 minutes before transferring to the refrigerator.
I don’t have a pressure cooker can I make this in the oven. I miss on QVC I always enjoyed watching you. I wish you the best. Theresa Chaney. Thanks
Hi Theresa. Yes, you can make this in the oven. Check out this basic cheesecake recipe for the instructions on how to do that: https://bluejeanchef.com/recipes/vanilla-cheesecake/
I. I noticed in one of your comments on a pressure cooker recipe that you said you had a 3 3/4 quart pressure cooker. I assume that must be one of the early pressure from the Q which I ordered and loved. Now however I cannot find a gasket for the lid and the pot sits on my shelf unused. Now what. QVC doesn’t respond. Made this with my 6 quart and it was great.
This recipe can be made in any pressure cooker as long as you can fit a 7-inch pan in the insert. As far as the missing gasket, you can try reaching out to the manufacturer of the unit to see if there is an available replacement part.
I didn’t quite make it as it was in recipe, I used a 9″ springform pan and made it… well bigger. It was delicious. It was such a nice change from my usual cheesecake and it was so tasty, the flavors blended so well together. Also, the tip for with not over mixing the eggs – first time ever that I didn’t have cracks in the cheesecake!! Thanks for sharing this recipe, I’ll definitely be making it again!!
So, I didn’t quite follow the recipe as written, I used a 9 inch springform pan and baked it in oven. However, the flavors were fantastic together and its so pretty when finished. Also, thanks for the tip with the eggs. It was the first time that I didn’t have cracks in my cheesecake.
I’m planning on trying this, but only can fit a 6″ pan in my Instant Pot. Can I make that work ?
It would work, but the pan does need to be at least 2 1/2 to 3-inches deep or you may not fit all of the batter into the pan.
I am hoping to bake this as a 9 inch recipe, and then I will bake in my oven as I have done many other cheesecakes. Any suggestion as to how to adjust the quantities of the ingredients? I am thinking to increase everything approximately 1/3. Thank you… This recipe looks delicious but I am for presentation purposes needing to make it in a 9 inch pan.
To make this recipe in a 9-inch springform pan you can increase the crust and cranberry filling by half, and double the cheesecake filling. So you will want to use 2 pounds cream cheese, 4 eggs, 1 1/3 cup sugar, 1/4 cup orange juice and the zest of 2 oranges.
Question: I have a 7″ silicone pan made for the Instant Pot. Do I still line it with foil?
Hi Chris,
The only reason to line the pan with foil is to make it easier to remove since it is not a springform pan. It would be easier to remove the cheesecake with a silicone pan since you can flex the pan. A piece of parchment paper in the bottom would be added assurance.